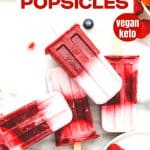
Berries and Cream Popsicles (keto & vegan)
This post may contain affiliate links from which I will earn a commission. Learn more in our disclosure.

Nothing says summer like popsicles, and what popsicles could be better than these refreshing and delicious Coconut Milk Mixed Berry Popsicles? They're dairy-free, vegan, and refined sugar-free–basically it's like eating Berries & Cream on a stick!

I'm all for ice cream and/or popsicles any time of year, but of course during the heat of summer popsicles are particularly refreshing. And there's something really special about the combination of berries and cream. In this case, it's not cream, but it's coconut milk.
When you need to avoid dairy, that's the next best thing. Thick and creamy coconut milk.

Berries and Cream–in Popsicle Form
Berries and cream is just such the perfect combination for a light refreshing dessert, don't you agree? First of all, the bright colors of the berries are complimented perfectly by the white cream (whipped or not).
Then the sweet intensity of the berries is mixed with the creaminess of the–cream, of course.
Well, now you can have that perfect combo in a popsicle form,–sans the dairy.
Our oldest has a life-threatening allergy to most dairy (he can have butter but no other dairy products), and my husband is lactose intolerant so we don't often have dairy in our home.
Coconut milk, on the other hand, is always available. In fact, we make this Homemade Coconut Milk several times a week.
These popsicles are:
- Dairy-free & vegan
- Gluten-free
- Paleo-friendly
- Refined Sugar-free
- Nut-free
- Soy-free
- Super easy to make!
So, these popsicles are nut free. Not sure if coconut is a nut, you say? You can check out my post called “Is Coconut a Nut?” to find out more about that all-important topic.
Whether it's summer or not, I think you'll love these healthy dairy-free Coconut Milk Mixed Berry Popsicles.
Ingredients
Following are the ingredients you'll need for these popsicles. For the measurements, see the Recipe Card below.
- strawberries
- blueberries
- raspberries (you can use any individual berry or combination)
- coconut milk
- stevia extract
- vanilla
- sald

How to Remove Popsicles from Molds
There are a few ways to do this:
- Remove the popsicles from the molds and let them sit at room temperature for 5-10 minutes until soft enough to remove
- Run the popsicle under hot water for 10 seconds
- Submerge the popsicle molds in warm (not hot) water for 10-15 seconds, then gently pull them out of the molds.
The final way (submerging) is the best way to do it if you can, since the popsicle is most likely to keep its form that way. But if all you are after is taste, any method will work.

The BEST Popsicle Molds
These popsicle molds are perhaps the best ones out there. They're made of sturdy silicone, so you can move them from counter to freezer without anything under it (to catch spills) but they also have a little bit of give so you can also squeeze the bottoms to help get the popsicles out when they're frozen. This is especially helpful for any popsicle with a whipped cream ingredient.

ecozoi Stainless Steel Popsicle Molds and Rack
Make your own Healthy Homemade Popsicles at home in this plastic-free and silicone-free mold. These molds are made from 304 stainless steel and are dishwasher safe. Stainless is not only one of the best materials for your non-toxic kitchen, but it also helps your popsicles freeze faster too!
Other Healthy Popsicle Recipes
If you love popsicles, try these other fantastic healthy options!
Keto Lime Popsicles – the delicious taste of key lime and coconut–together
Strawberry Sage Popsicles – an unusual but truly refreshing treat
Sugar-free Fudgesicles – surprisingly taste just like the real thing
Superfood Berry Popsicles – an incredibly refreshing treat
Watermelon Popsicles – only 3 ingredients with 7 fun variations!
Recipe Notes
For a Blended Creamy Berry Popsicle: Stir the coconut milk and berry puree mixtures together, then divide evenly between the popsicle molds. Freeze until firm.
Berry Options: Use any combination you like, adjusting the sweetness level as necessary with the simple syrup. The sweetness of the popsicles will mellow a bit after freezing, so keep that in mind.
Sweetener Options: You can substitute another like agave, maple syrup, or honey if you like. You could also use 1/2 cup of sugar-free simple syrup. For regular sugar or another 1 to 1 replacement, use 1/2 cup. If using a granulated sweetener, blend it before or after adding to the liquid.
Coconut Milk: Full-fat coconut milk is best for this (and most) recipes since it will result in a creamier texture that is more like regular cream. You can use lower fat-content coconut milk, but the results will be less creamy and more “icy.” This Homemade Coconut Milk will work as well, but you might want to use a higher coconut content and strain with a nut milk bag for a creamier texture.

Special Diet Notes
This recipe, as is, is naturally vegan, low-carb, gluten-free, and dairy-free.
Since it has berries, this recipe can't easily be made to work for the AIP (autoimmune paleo). However, you could use another fruit, like mango, and use a non honey or maple syrup for the stevia. The color will change, of course but they would still taste amazing.

Coconut Milk Mixed Berry Popsicles
Equipment
- Popsicle Molds (Here's another option for a good popsicle mold in case the other one is out of stock)
Ingredients
- 1/4 cup blueberries
- 1/2 cup raspberries
- 3/4 cup strawberries
- 1 15 ounce can coconut milk
- 1/8 – 1/4 teaspoon stevia extract (or to taste. See Recipe Notes for alternatives.)
- 1 teaspoon vanilla extract
- dash salt (optional, but highly recommended)
Instructions
- Place fruit in a blender or food processor and puree until smooth.
- Strain fruit puree through a mesh strainer.
- Combine the strained fruit with half of the stevia.
- Add the rest of the stevia, vanilla, and salt to the coconut milk.
- Alternate layers of the berry mixture and the coconut milk mixture to the popsicle molds, starting with the berries.
- Place the popsicle molds in the freezer until frozen through.
Notes
If using a granulated sweetener, blend it before or after adding to the liquid. Coconut Milk Notes: Full-fat coconut milk is best for this (and most) recipes since it will result in a creamier texture that is more like regular cream. You can use lower fat-content coconut milk, but the results will be less creamy and more “icy.”
Nutrition
Nutritional information is provided as a courtesy and is an estimate only. It may vary depending on ingredient brands, substitutions, and preparation methods. Optional ingredients are not included. Net carbs are typically calculated by subtracting fiber and sugar alcohols (such as erythritol) from total carbohydrates. This information should not be relied upon for medical or nutritional purposes.
This sounds yummy! Would these work with coconut yogurt too? Thanks for all the recipes!
Sure and you are so welcome!
Do you perhaps have a link to the molds you used? They look really nice
Hi Carol! I just got that in the post for you — they are great and not just pretty either–you’ll see why in the post!
Hi there . . . . is there a way to subscribe to your posts? I love the way you think!
Hi there! Awww thanks! I am having trouble figuring out a better link, but you can go here and get the download or see the optin in the sidebar or at the top of the blog. Thanks and look forward to having you around!