Make Your Own Soap Without Lye (You’ll See What I Mean)
This post may contain affiliate links from which I will earn a commission. Learn more in our disclosure.
If you've always wanted to make soap but are worried about working with lye, here's your answer. This homemade lye-free soap is truly the “I'm scared to work with lye” version of How to Make Homemade Soap.

Homemade soap is great for many reasons, but it can be a bit daunting to make. One of the reasons is the need to work with lye. It's definitely not something you want to be working with when you have little ones running around.
Thankfully there's an answer for that and I'm sure you'll be surprised at how easy it is and how gorgeous the results can be.
I Was a Lye Scaredy Cat
For years, I've wanted to make my own soap, but I've never done it.
I've drooled over others' homemade soap creations and felt deficient in my thriftiness, craftiness, and domestic skills, simply because I'd never. made. soap.
I have fond memories of a dear friend in the Chicago area who made HUGE batches of olive oil soap that was TO DIE FOR. She had enough money to buy whatever soap she wanted, but she just LOVED making soap and well, her soap was skin nourishing gorgeous.
She gifted me this soap when I was pregnant with our first child, but I wrote off making it because no way was I going to use lye in a kitchen where I'd have to time things so I didn't have a busy and inquisitive infant or toddler underfoot.
So I basically gave up all the soap-making dreams, and they never really came to be.
I even found the very book that my friend's soap recipe came from at a second hand store (and bought it), but I STILL never made soap.
So when a friend approached me about sharing a recipe for melt and pour soap that was easily made into “homemade soap” style, I was thrilled.
I assumed many other busy “lye scaredy cat” moms would love the chance to be crafty without being around something that might be a problem for their children's safety.
Lye-free Soap. Is It Possible?
Would you like to create an all natural product, free of harsh chemicals, that radiates your personality and taste? Consider hand-milled soap!
Also known as melt and pour soap, this method allows you to forgo the hazards of working with caustic lye, while enjoying the creativity of soap making.
This is why the title of the post includes the words “you'll see what I mean.” The lye work has been done for you already in making the melt and pour soap base.
Why You'll Love This Soap
There are simply so many reasons to love this soap. Let's count the ways, shall we?
No Toxic Additives
So many soaps on the market are loaded with artificial colors, artificial fragrances, and preservatives. If you make your own melt-and-pour soaps, you can use quality ingredients without the toxins.
Saves Lots of Money
Of course, if you make your own melt and pour soap, you will save a bunch of money over store-bought fancy soaps. With all the great melt-and-pour bases, you can make exquisite soaps to rival any “artisan” type of homemade soap.
Avoids Allergens
More and more people have sensitivities these days. Making your own soap allows you to customize ingredients to your needs.
Directions
Grate the soap base.

Add oil to soap, if desired.
Heat on low setting in a double boiler or crock pot. Stir frequently.

When liquefied, remove from heat.
Add desired ingredients.
Stir to desired consistency. Pour (or spoon) the soap mixture into molds. I placed some dried rose petals on the bottom of this flower mold.

Cool and remove from the mold. Cut into desired sizes and shapes using a soap cutter or a food scraper/shovel if needed.
Allow soap to dry.

Important Ingredient Information
1. Soap Bases, Including One That Really Stands Out
First of all, look for soap that is free of chemicals and fragrances. The simpler the better when it comes to hand milling. White or cream-colored work best.
Some of the more trusted online sources include:
- Brambleberry
- Bulk Apothecary
- Amazon
Here are some options for melt-and-pour soap bases with my favorite highlighted at the end.
- Goat's Milk Soap Base – this is a pretty nice base
- Glycerin Soap Base – makes a traditional clear melt-and-pour soap
- Cocoa Butter Soap Base
- Shea Butter Soap Base – this one seems to perform very well and has great reviews and the ingredients are really clean for a melt-and-pour base. If you want an artisan-type soap that's easy to make, this is a great way to go.
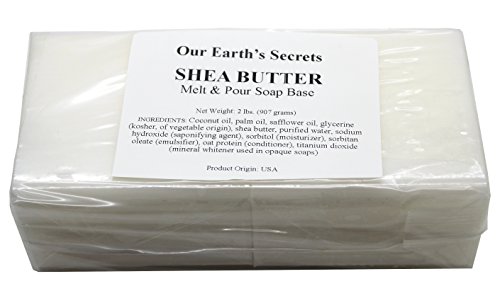
Shea Butter - 2 Pound Melt and Pour Soap Base
This Shea Butter Melt and Pour Soap Base is one of the cleanest soap bases out there. Plus it helps you create soaps that look very close to artisan soaps -- all without handling lye!
It's made from 5% refined shea butter, and is soy free, lathers well and is made in the USA.
2. Molds
A simple bread loaf pan will work depending on how much soap you're melting. Line the mold with parchment paper for easy removal.
Silicone molds work really well too. These come in fun shapes and sizes like this flower mold (similar to the one used for the soaps in this post).
Note that you'll need parchment paper if you choose the bread mold pan option.
3. Herbs and Plants
Do you love lavender? Dried lavender or fresh lavender makes a perfect addition.
Roses? Dried rose petals or even fresh rose petals work beautifully.
Plant powders can add not only skin benefits but double as natural colorants. Turmeric, for example, turns the soap a lovely orange while adding nourishing anti-inflammatory qualities. Spirulina powder makes a lovely green. Beet powder adds a nice pink color.
4. Pure Fragrances
Forgo the petroleum-based fragrances and add scent using 100% natural essential oils. Essential oils carry through the hand milling process quite well – so pick a scent you enjoy and have fun!
Herb/essential oil combinations that work well include:
- Thyme Oil with turmeric powder
- Plumeria Oil with dried lavender
- Peppermint Oil with activated charcoal for a deep cleansing experience.
How Much Essential Oil Should You Add to Soap?
How much essential oils you use in homemade soap depends on several things including how strong of a scent you would like, and the oil you are using.
For a strong scent, 0.7 ounces of essential oil per pound of cold process soap is a good amount. For melt and pour, you can typically add 0.3 ounces per pound.
Cold process soap is more of a harsh process and there are a number of chemical changes that occur when making the soap, so you can use more oils.
To avoid skin irritation it's important to not use too much of an essential oil in your soap. This fragrance calculator can help you choose the right amount of essential oils to use.
5. Liquids
You'll need to add a slight amount of liquid to keep the soap from burning during the melting process. While water works fine, possible liquids that add some nice benefits and make your soap special include coffee, green tea, kombucha, infused herbs, coconut milk, and floral hydrosol.
6. Fun Add-Ins
Besides things like herbs and plants, there are so many other fun add-ins. The sky is truly the limit!
How about:
- coffee beans
- cacao nibs
- coffee grounds—smell great and are great for exfoliating too
- citrus peels
- seeds (chia, poppy, apricot, flax)
- matcha powder—adds a lovely green color
- Himalayan salt—adds a nice pink hue
- tea leaves

Ingredients
- 8 ounces Natural Soap Base
- Molds (I love these flower molds, circular molds, or these simple bar molds)
- Herbs or flowers (like these lavender flowers), rose petals
- .15 ounces Essential Oils (about 90 drops)
- Parchment Paper (depending on what mold you use)
- Grater (a cheese grater, salad shooter, or food processor are good choices)
- 1/2 teaspoon oil (optional)
Instructions
- Grate 8 ounces of the soap base (two regular size bars.) A cheese grater works well, as does a salad shooter. A food processor also works.
- Add the oil, if desired, to thin the soap.
- Heat on low in a double boiler or crock pot. You can also place in oven-safe pot and heat in the oven at lowest setting. Stir frequently to avoid burning. This can take anywhere from 15 minutes to an hour.
- When soap is liquefied, remove from heat. It will be somewhat lumpy and translucent.
- Add desired ingredients.(For the main photos here, I used Pink Himalayan salt and dried rose petals from my daughter's wedding. I added Rose Geranium essential oil which created a lovely rose scent.)
- Stir to desired consistency. Pour (or spoon) soap mixture into molds. I placed some dried rose petals on the bottom of this flower mold.
- Cool the soap and remove from mold (place mold into freezer for up to 1 hour to make this easier). Cut into desired sizes and shapes using a soap cutter or a food scraper/shovel.
- Allow soap to dry for several days or more.
- Dry the soap thoroughly between uses to extend its life.
More Easy DIY Personal Care Products You'll Love
How about trying out the following DIY Personal Care Products too? These are great ways to take more steps towards clean living.
- Nourishing Sugar Scrub
- Homemade Lip Scrub – your lips will love this!
- Homemade Moisturizing Foaming Soap– a super frugal alternative to store-bought foaming soap
- Homemade Body Wash – smells and works great
I'd love to hear how this goes for you!

Andrea is a former journalist and the mother of nine children ranging in age from 28 to 12. Following a toxic mold exposure, Andrea and her family discovered the wonders of natural living. Andrea is the founder and president of momsAWARE, an educational organization designed to empower others to live healthy in a toxic world. You can follow her family’s journey at It Takes Time.
Melt and Pour soap IS NOT without lye.
Hi Adrienne (really nice name, by the way :))!
I understand your thoughts but I did make it very clear in the post in multiple places that this was about not handling lye and not about lye not being present in the soap process at all. The woman who wrote the post initially wanted to give people a way to make nice homemade soap for themselves and others without dealing with lye. Hope that helps. Thanks for reading.
You should check what can be used for soapmaking instead of lye in the following website. Nerdy Farm Wife.
As the banana leaf extract is an alkali and both butter and ghee are fats, if you heat the mixture, then it will surely form a soap due to a saponification reaction between banana leaf powder or banana leaf paste and melted ghee or melted form of butter which is because soap is the chemical result of the reaction between fats and an alkali, and it was used by the olden day grandpas and grandmas for making soap, it was possible as the only active chemical of banana leaf is KOH which is a kind of lye, owing to its much bitter taste. However as KOH is not edible usually, it gets mixed with a few others here.
Thanks – interesting!