How to Make Coconut Milk (No-Strain Option)
This post may contain affiliate links from which I will earn a commission. Learn more in our disclosure.
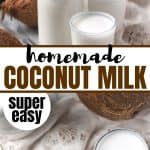

Homemade coconut milk is a fantastic recipe for dairy-free milk made with only two ingredients that tastes great and saves a lot of money over store-bought options.
I'm sharing two great methods for making this: a regular hot water version and a no-strain version. The no-strain option is what we make most of the time and it's super creamy and foamy immediately after blending, while the hot water version is best for a smooth traditional coconut milk.

I'm all about DIY versions of kitchen staples like almond milk, homemade rice milk, powdered sugar substitute, and dairy-free condensed milk.
Basically, if it's possible to DIY it, especially when it comes to food items, you better believe I'm going to try it.
And making homemade coconut milk is one of the easiest things you can make at home.
All you need is dried coconut and water. That's it.
Why Make Homemade Coconut Milk
Homemade coconut milk is so much less expensive than store-bought, and it has no unwanted additives like emulsifiers or preservatives.
It's also customizable. Add sweetener or flavoring as you like using whatever ingredients you'll like.
How to Make Coconut Milk (Hot Water Method and No-Strain Option)
The best way to make homemade coconut milk is to use hot water to soften the dried coconut. This yields a smoother result that's closer to store-bought.
- Add shredded coconut and hot (not boiling) water to blender
- Let sit 1-2 minutes (optional)
- Blend until smooth and fully combined (30–60 seconds)
- Use as-is (no need to strain), or strain using a nut milk bag or cheesecloth for smoother texture
- Adjust thickness with more water if needed.
Strained vs. No-Strain Coconut Milk
Most recipes for homemade coconut milk require straining. No-strain coconut milk is another option and is by far the easiest method. It’s also what we use most often in our home.
It's super fast and amazingly creamy right after blending, which makes it perfect for busy mornings when you don't have time for straining or heating water.
Simply use room temperature filtered water, blend with coconut shreds, and use. After cooling, it does get grainy. So you stir, shake and accept it as we do, or reblend.
No-Strain Coconut Milk
- fastest method
- slightly more texture
- very smooth and rich, especially when fresh
- no nut milk bag needed
- great for drinking right away and for recipes
Strained Coconut Milk
- smoother, more like store-bought
- better for consistent texture after the first day
- requires straining equipment
- takes more time
Any homemade coconut milk will separate some after chilling due to it not having additives like store-bought milk, but it's more dramatic with the no-strain version. For either option, simply shake or stir before serving.

Ways to Strain Coconut Milk
Straining coconut milk gives a smoother texture, but it’s important to consider cleanup and how to handle the leftover pulp because the fat and fiber can build up in pipes over time and lead to clogs.
Nut Milk Bag
A nut milk bag is a good reusable option for straining coconut milk. After straining, you remove the pulp and then rinse the bag.
Fine-Mesh Strainer
A fine-mesh strainer is another option but it's possibly the most difficult to use. Like the nut milk bag, clean off as much of the pulp as possible and then rinse.
Cheesecloth (Easiest Cleanup)
Cheesecloth is the easiest cleanup option. You simply use it and toss it in the garbage after use; no scraping or rinsing needed. If you buy it in bulk, it's pretty inexpensive per use.
Simply cut the cheesecloth into 8-12 inch squares, using a double layer if desired for better straining. Though it's a single-use item, it is cotton, so it degrades naturally and can even be composted.
How to Use Leftover Coconut Milk Pulp
Leftover coconut pulp can be added to smoothies, hot cereals like oatmeal or this Cream of Rice, baked goods, or dehydrated for later use.
Some people dry it and use it similarly to coconut flour, though the texture is more coarse and not exactly the same as store-bought coconut flour.
We typically skip saving it for simplicity, but it's a great way to reduce waste if you strain your coconut milk.
How to Use Homemade Coconut Milk
- In recipes as a dairy-free alternative if you are dairy allergic, vegan, or just plain out of milk
- In smoothies
- Plain: our son LOVES coconut milk with some stevia extract or this Liquid Vanilla Stevia
- Over hot or cold cereal, or even on Baked Oatmeal
- Frozen into coconut milk ice cubes to keep drinks from being diluted with water
- In hot drinks like coffee, tea, coffee substitute or as a base in this Caffeine-free Chai Latte or Protein Hot Chocolate (the creamy no-strain version is especially delicious in these)

Frequently Asked Questions
Do you have to strain coconut milk?
No — it depends on your preference. Straining gives a smoother texture, but skipping it is faster and works well, especially in hot beverages.
Can you make coconut milk from shredded coconut?
Yes — dried unsweetened shredded coconut works great.
How long does homemade coconut milk last?
Typically 3–4 days in the fridge.
Should you use hot water for making coconut milk?
Yes, using hot water is much better for making homemade coconut milk, but you can use cold water and still get good results.

Homemade Coconut Milk
Ingredients
- 1 cup dried unsweetened shredded coconut
- 3-4 cups hot water (not boiling. Adjust for thickness.)
Instructions
- Place the shredded coconut in a high-speed blender.
- Pour hot (not boiling) water over the coconut. Let sit for 1–2 minutes to soften (optional but recommended).
- Blend on high for 1–2 minutes until smooth.
- Strain through a nut milk bag or cheesecloth if desired.
- Use immediately or store in the refrigerator.
Notes
- Faster no-strain option: For a quicker method, blend coconut with room temperature water and skip straining. This version is slightly more textured but still works well for many uses.
- Straining tip: For easiest cleanup, use cheesecloth and discard after use, or remove pulp before rinsing to avoid buildup in your sink.
- Storage: Coconut milk will naturally separate in the fridge. Shake or stir before using.
- Optional sweetener: If desired, you can add a small amount of sweetener such as stevia, maple syrup, or honey to taste after blending. Start low and adjust to taste.
- Salt: If using sweetener, add a dash of salt.
- Yield amount: This will vary slightly depending on how much water you use and whether or not you strain the milk.
Nutrition
Nutritional information is provided as a courtesy and is an estimate only. It may vary depending on ingredient brands, substitutions, and preparation methods. Optional ingredients are not included. Net carbs are typically calculated by subtracting fiber and sugar alcohols (such as erythritol) from total carbohydrates. This information should not be relied upon for medical or nutritional purposes.
More Whole Food Pantry Staples
- Powdered Egg Replacer – Great for all your baking needs. Comparable to store-bought egg replacers.
- Powdered Sugar Substitute – Works just like the real thing.
- Easiest Almond Milk Ever – Similar to this recipe, and ready in minutes.
- Homemade Rice Milk – So simple and budget-friendly.
- Homemade Coconut Butter – So simple and so frugal!
- Homemade Taco Seasoning – Tastes better than store-bought packets.
- Keto Cinnamon Sugar – A delicious low-carb option. See which blend we liked best.
Have you ever made Homemade Coconut Milk?
If I had to buy anything, for this recipe, I would definitely make sure it’s organic, and not processed!
This an awesome way to make coconut milk. I’d like to add a note from other sites that have worked for me. What I do is heat the water before adding it to the blender. Not boiling, but hot. I find that it extracts more of the coconut essence during blending.
Perfect – thanks!!
Awesome. So glad there is someone out there who thinks like me. Thank you dear Adrienne. I feel as if I’ve found a sister. Stay beautiful just like your recipes. ?
Thanks so much for the lovely comment. I’m not sure about beautiful but I’m trying to do my best. :)!!!
Im super excited to have just found your site. I like you made my coconut milk the “easy way” blend and drink. This new technique is brilliant! Thank you very much to you and your contributor.
Thanks so much, Desiree! I’m so glad you like it. We do too and make it almost every day!
I didn’t see a step for straining this milk. Do you?
I don’t! It’s super easy!
Grrr… no need to complicate a recipe with links to here, there and everywhere! I have learnt nothing and will avoid this site in the future!
Hello Oscar. You don’t need to follow the links – they are there for added information or purchasing options. Sorry you feel that way. I was trying to be helpful.
I receive multiple questions from people asking for more information or “where to buy such and such” so I try to put in helpful links for my readers. Hope that helps and that you will change your mind about coming back. Take care.
Hi,
tried your recipe with coconut flour…that is all that I had in the house
SUPERB…
REALLY thick and creamy…only 1 cup makes tons.
Half went into a pudding with eggs
Other half is in fridge settling in bottle. Will use the dregs for bread!
WOW
Thank you for this substitute!!!
Just found your site. I love the links. Keep them coming, please.
Hi there – thanks! So glad to have you here!
You don’t have to visit this site but consider being respectful
I came to this site to find out about using coconut flour as I can only find organic coconut flour and not shredded and am surprised – have made 2 batches of really creamy coconut milk recently – I use warm water blend for 30 seconds in a nutribullet and then sieve through a double layer muslin cloth. Use the remaining pulp for smoothies and baking. The ratio I use is one cup flour to two cups water. Usually forms a creamier layer overnight in fridge in a wide jar. Can add extra water to thin.
I had same separation with “skim” milk & floating coconut fat using Vitamix. Next time will use warm water in lieu of cool water to see if makes difference. I’m going to use the milk but add scoop “fat” too until I finish this batch.
My blender is far from high powered but I gave this a try. I have coconuty water with big clumps of coconut fat. Oh well! We just use it for smoothies and this is cheaper than cans of milk, plus no guar gum or preservatives!
Oh no – so sorry about that! I wonder if you kept blending if it would work? Way to have a good attitude and yes, works great for smoothies!
Mine separated the first time as well. If you don’t have a high powered blender then heat your water just to almost boiling before you start belending. And definitely don’t add ice which will make it curdle like crazy! (I know because I tried).
Okay, so you’re thinking organic. Why not just be real?
Buy yourself a couple of coconuts. [At any good market, cocos secos enteros – whole, dry (husked) coconuts. About a buck each.]
Drill out two of the “eyes” and drain the juice – usually 1/2 to 3/4 C – into a measure.
Drop the coconuts onto a hard floor – they’ll crack. Split the at the crack and open ’em up. Score the meat with a knife and dig it out with a spoon. Now, follow your favorite blender recipe using real coconut, the water from the real coconut, and enough more water to get the consistency you’re expecting. What you’ll get for your effort is something that doesn’t come off the shelf.
Your TOM KA will never be the same. If you make Thai curries, they will sing. And if you are trying to “get” Indonesian or Cape Malay cuisine, you’ve got the grail.
Or, try this.
Dash each of finest ground allspice, clove, vietnamese cinnamon, anise or whatever else you want to try into 2 Tbsp of fresh lime juice. Using your garlic press, add 10-12 drops of ginger juice. Let it sit a while and strain it into a highball glass 3/4 full of chilled coco milk. Add 1/2 a shot of 43, a Spanish vanilla liquer, and a shot of great clear liquor (except gin). Pour through cracked ice into another glass, garnish with lime zest.
Voila! A wholesome non-dairy concoction that will make you stop worrying about a lot of things best ignored.
Sounds lovely!!!
I love it! Sounds delicious!