Homemade Sun-Dried Tomatoes—3 Ways
This post may contain affiliate links from which I will earn a commission. Learn more in our disclosure.

Sun-dried tomatoes add amazing flavor to any dish, but they're pretty pricey. Thankfully, it's incredibly easy to make homemade sun-dried tomatoes yourself, and there are several ways to do it.
I personally use the dehydrator to make sun-dried tomatoes most of the time, but I'm sharing an oven method as well and even tips for drying them in the sun if you're feeling adventurous.
While I love making this Easy Marinara with extra tomatoes too, nothing beats the simplicity of this recipe.
What are Sun-Dried Tomatoes?
If you haven’t had sun-dried tomatoes before, you are missing out, big time! They’re ripe tomatoes that have been dehydrated to remove 80-90% of their water content.
Sun-dried tomatoes have a strong, sweet-tangy flavor that’s much more intense than regular, fresh tomatoes. They taste incredible in so many different dishes when you want that tomato flavor to really shine or just want to add something special to any dish.
Why Make Homemade Sun-Dried Tomatoes
Here are some great reasons to make your own sun-dried tomatoes at home.
- A great way to preserve tomatoes from your garden, local farmer’s market, or CSA.
- More nutritious: Fresh produce loses nutrition starting immediately after it's picked. Dehydrating tomatoes preserves that nutrition.
- Much more economical than store-bought.
- You can control the amount of salt used.
- So easy to make, it's almost foolproof!
- They taste incredible (even better than store-bought).
- You can season them as you like.
- They make terrific homemade gifts.
Ingredients
You only need a few things to make your own sun-dried tomatoes at home.
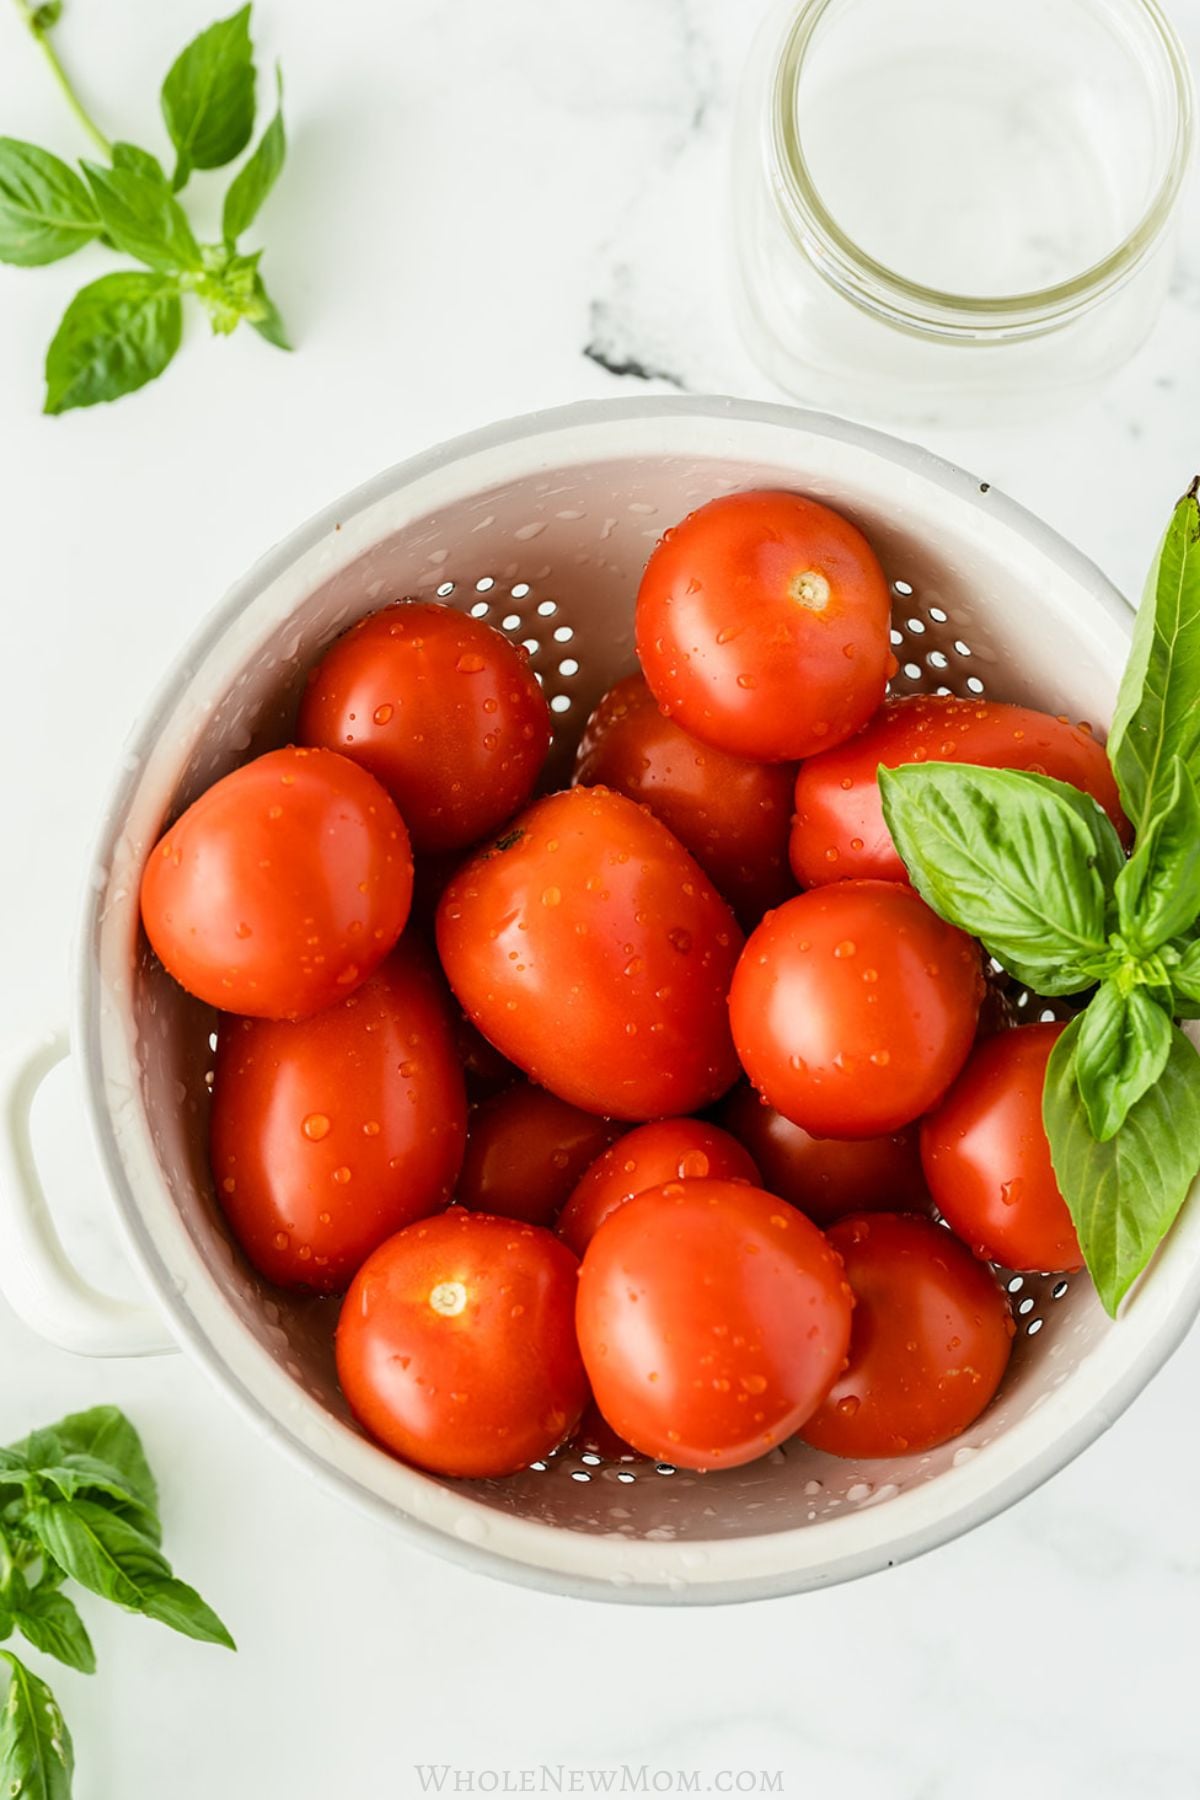
- Tomatoes: Any kind of tomato will work, from cherry to jumbo! Cherry, grape, and pear, however, will dry faster due to the lower water content.
- Sea Salt: Salt is a “must-have” because the salt brings out the flavors of the tomatoes. However, go light because the tomatoes are so flavorful that they don't need much. Plus, the tomatoes dry up to less than half their size, making the salt more concentrated.
- Oil: Though oil is optional, I highly recommend it for added taste and texture.
- Seasonings: Also optional, but adding dried or fresh seasonings like herbs or garlic to your sun-dried tomatoes makes them extra special.
3 Ways to Make Sun-Dried Tomatoes
Dehydrators are great for so many things, like preserving herbs, soaking and drying nuts and seeds, making fruit leathers, kale chips, green bean chips, coconut shreds, and more.
Using a dehydrator is my absolute favorite way to make sun-dried tomatoes, and I've been doing it for years. It's easy and reliable, and the dehydrator provides consistent airflow and controlled temperature for even drying.
With dehydrating, you can also keep the temperature really low (set your dehydrator for 125°F) so that technically you can have truly raw sun-dried tomatoes.
The oven is the most common option for making sun-dried tomatoes because everyone has an oven, and it's the quickest option.
Drying in the sun is the traditional way to make sun-dried tomatoes (hence the name.) However, this is the most unreliable due to weather, bugs, and other critters. No one wants to be eating sun-dried bugs! See the detailed notes below if you’d like to try this traditional method.
How to Make Sun-Dried Tomatoes
Wash tomatoes and either gently pat them dry with a towel or allow them to air dry. You don't want extra moisture on the tomatoes when the point is to dehydrate them.
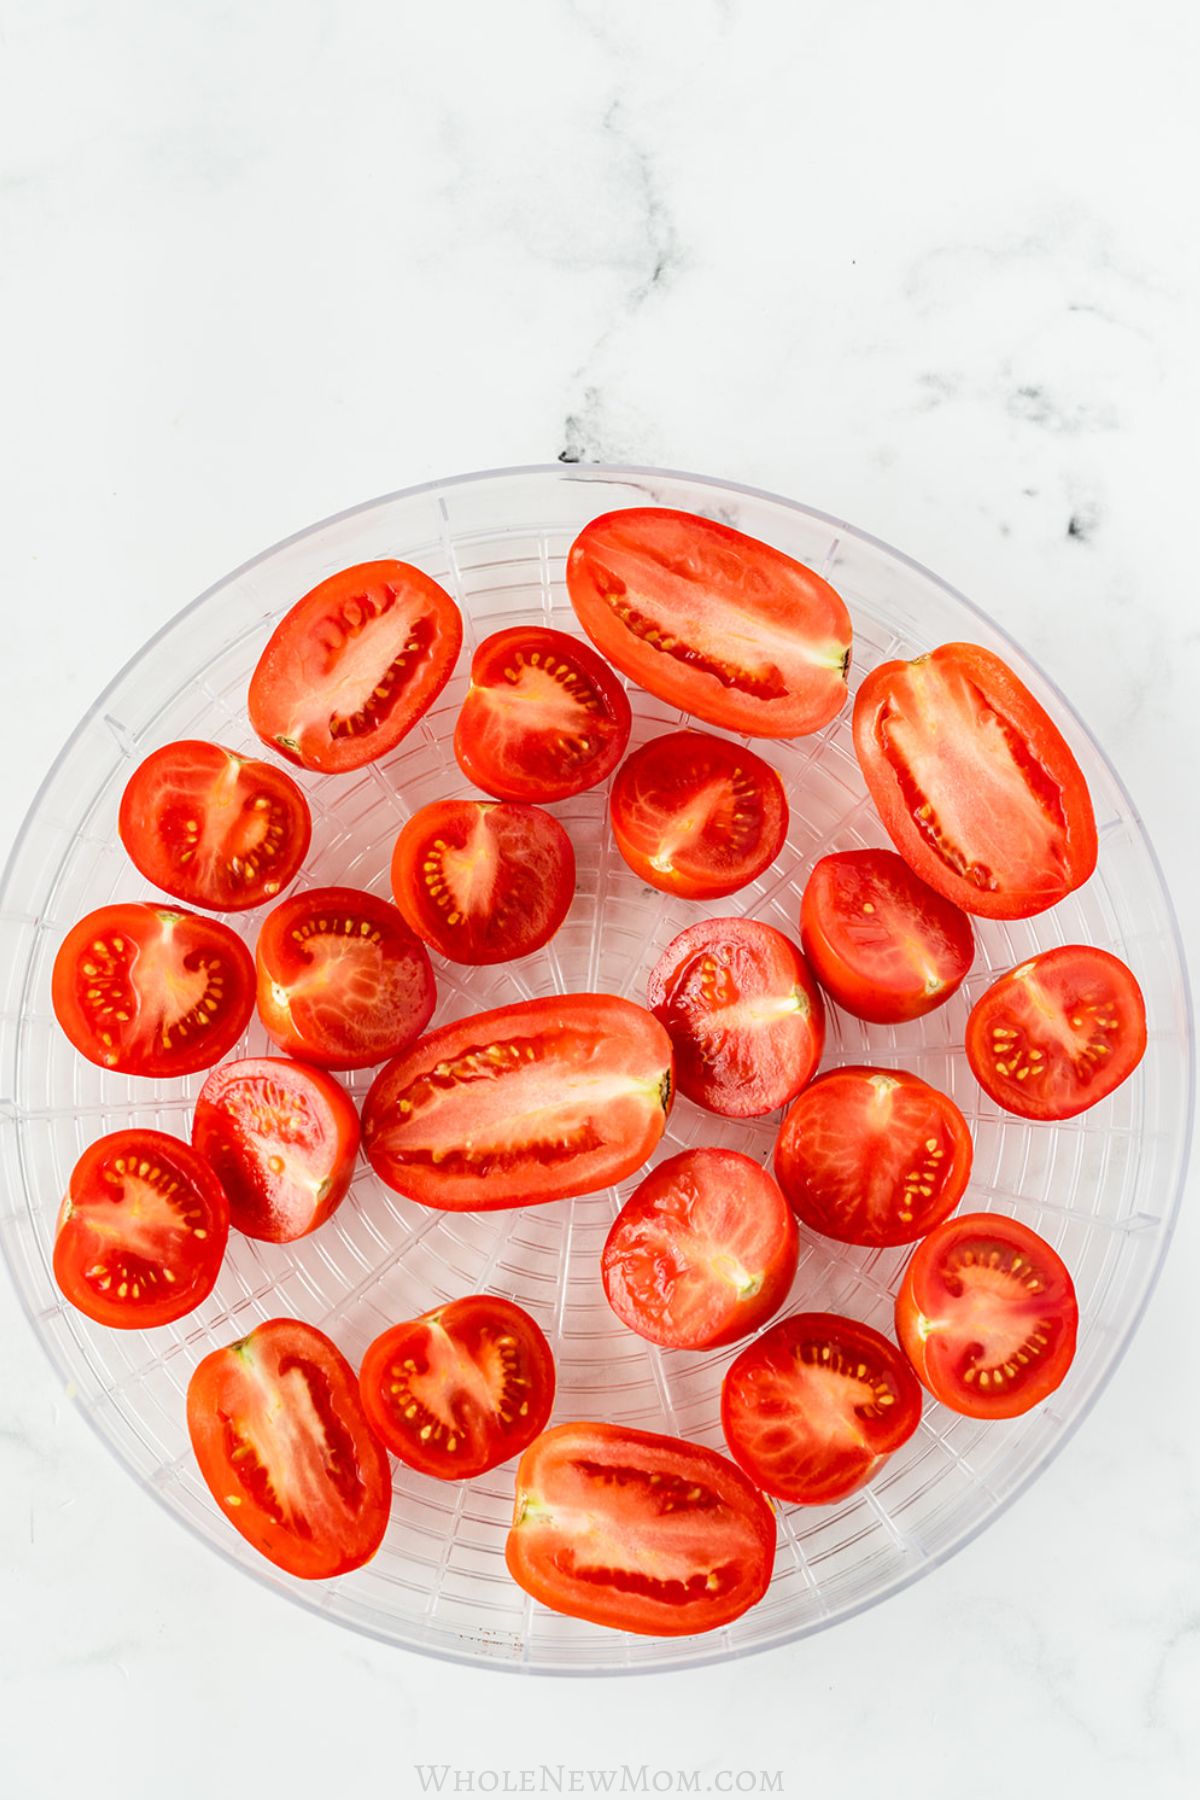
Remove stems and cut out the center core (if applicable).
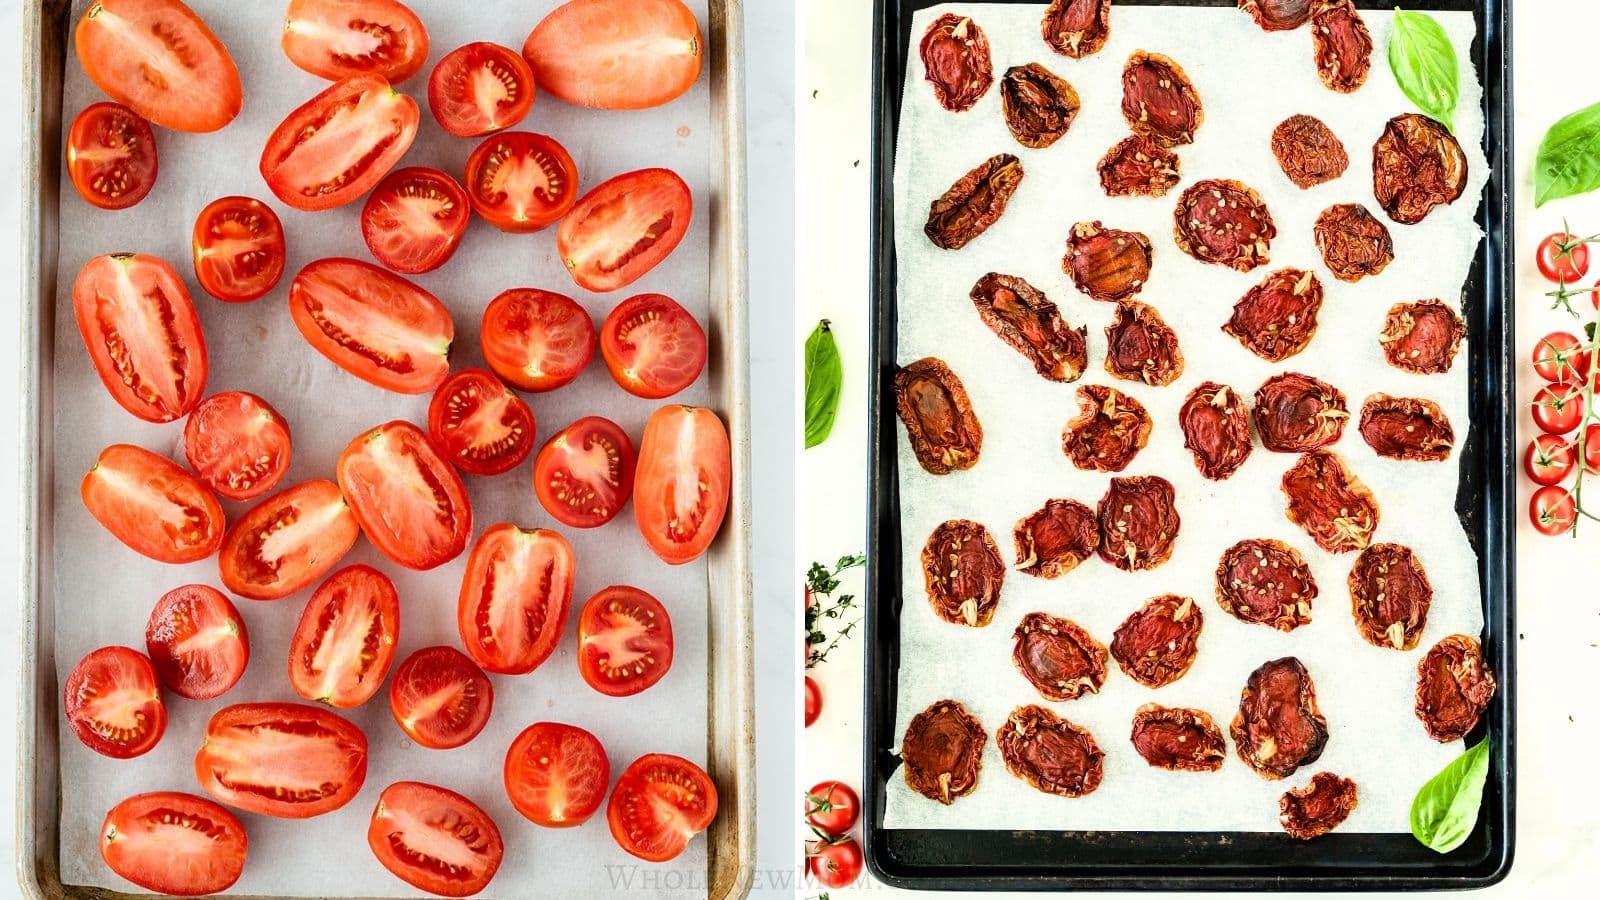
Slice the tomatoes as uniformly as possible, into either slices, wedges, or halves.
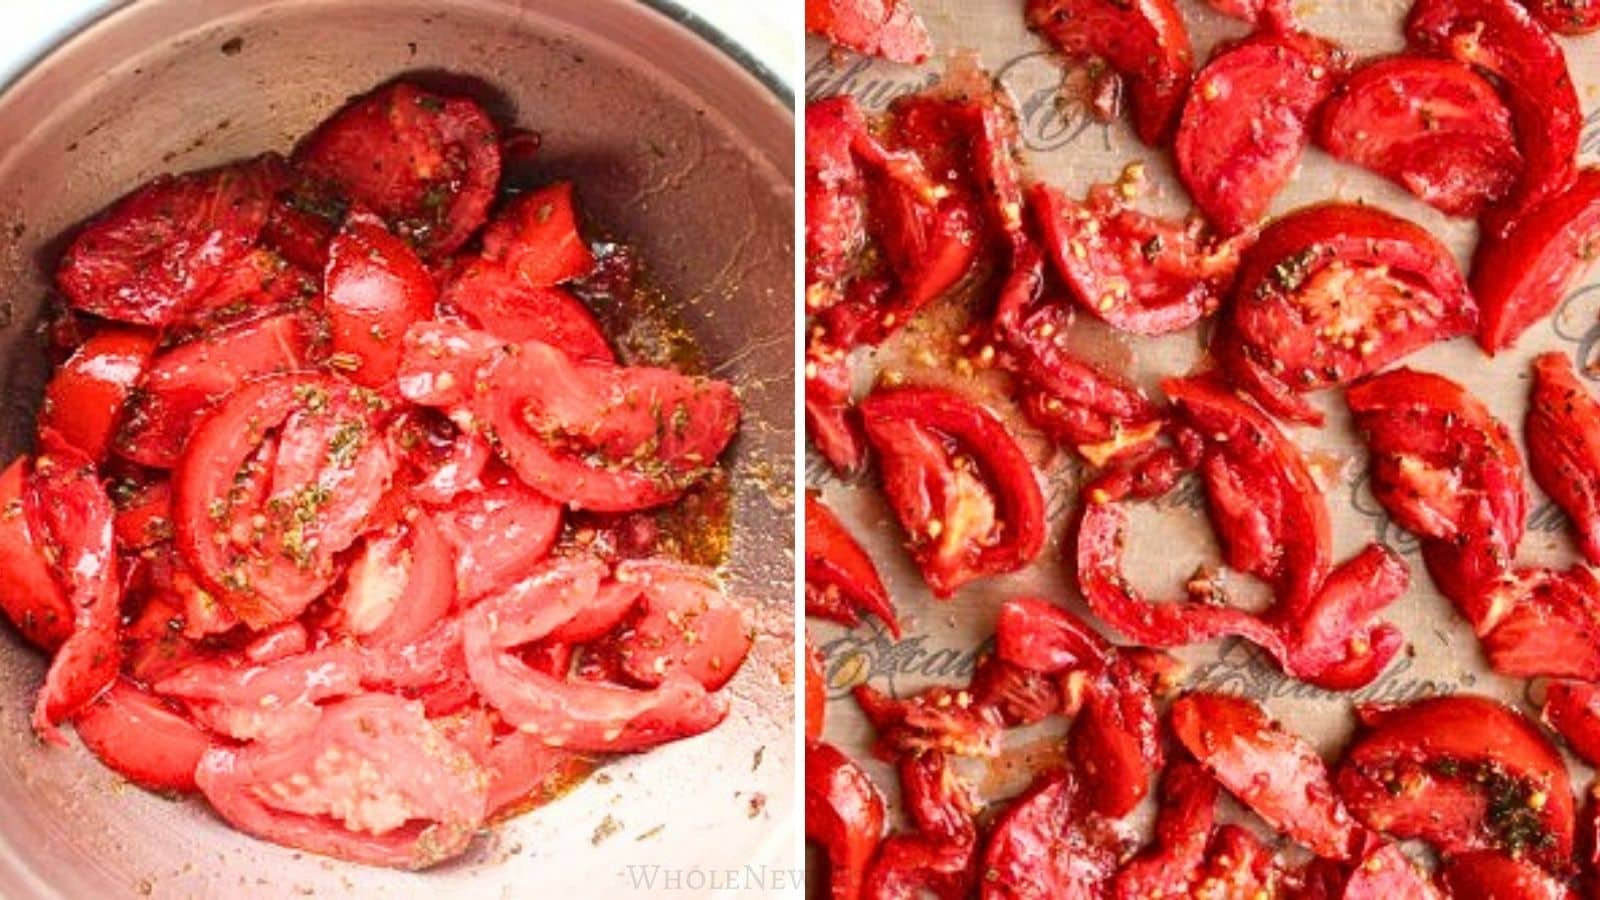
If using olive oil, salt, and herbs before dehydrating, or at all, place the tomatoes in a shallow bowl or on a plate. Drizzle with olive oil and sprinkle with salt and herbs. Toss gently to coat.
Dehydrator Method (Most Reliable)
This is my preferred method because it’s easy and consistent and doesn’t depend on weather, and no bugs are involved!
Here are photos of tomatoes drying on trays in my own kitchen. I’ve used these exact methods for at least 15 years during peak tomato season when I need to preserve large batches quickly. While I love freezing tomatoes too, sun-dried tomatoes take up much less space and are so tasty!
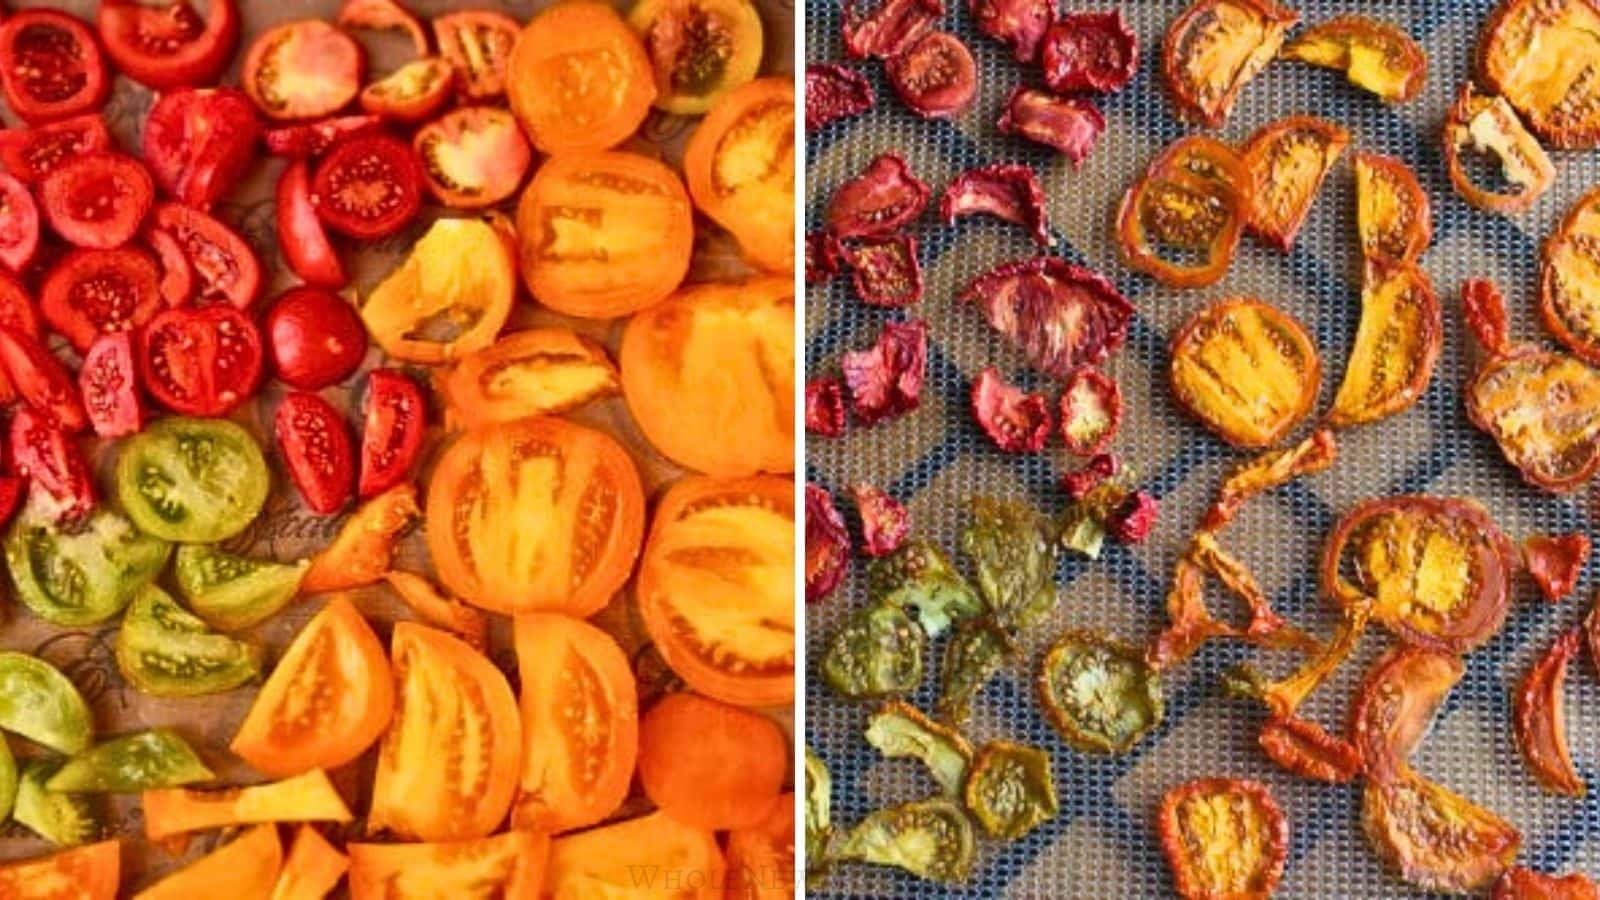
Place the tomatoes on dehydrator trays, or on screens, skin side down if using wedges or halves. Try to prevent the tomato pieces from touching.
Set the dehydrator at 125°F and dehydrate until completely dry, but still pliable.
Oven Method (Fastest)
Place the tomato slices or wedges on parchment paper on a baking sheet. Heat your oven to a low temperature.
Make sure to watch them closely to prevent burning. This method can take quite a while: even up to all day.
How to Tell When Sun-Dried Tomatoes Are Done
Most sun-dried tomatoes are dried until they are leathery and pliable, which preserves their texture and flavor for use in most recipes.
However, you can continue drying them until they become fully crisp if you prefer. Crisp tomatoes have a longer shelf life and can be rehydrated later or ground into tomato powder, which is useful for seasoning blends, sauces, and recipes like this Homemade Taco Seasoning.
When fully dried:
- The tomatoes will be much smaller than when fresh.
- They should not feel sticky or wet.
- No visible moisture should remain on the surface.
- They should bend slightly without snapping.
If the tomatoes feel soft or moist, they need more drying time. Removing excess moisture helps prevent spoilage and allows them to be stored safely. I often bite a few tomatoes to see how they feel in my mouth. It's a yummy test, too!
Drying time can vary depending on tomato size, thickness, and humidity, so it’s best to check them periodically toward the end of the drying process.
How to Store
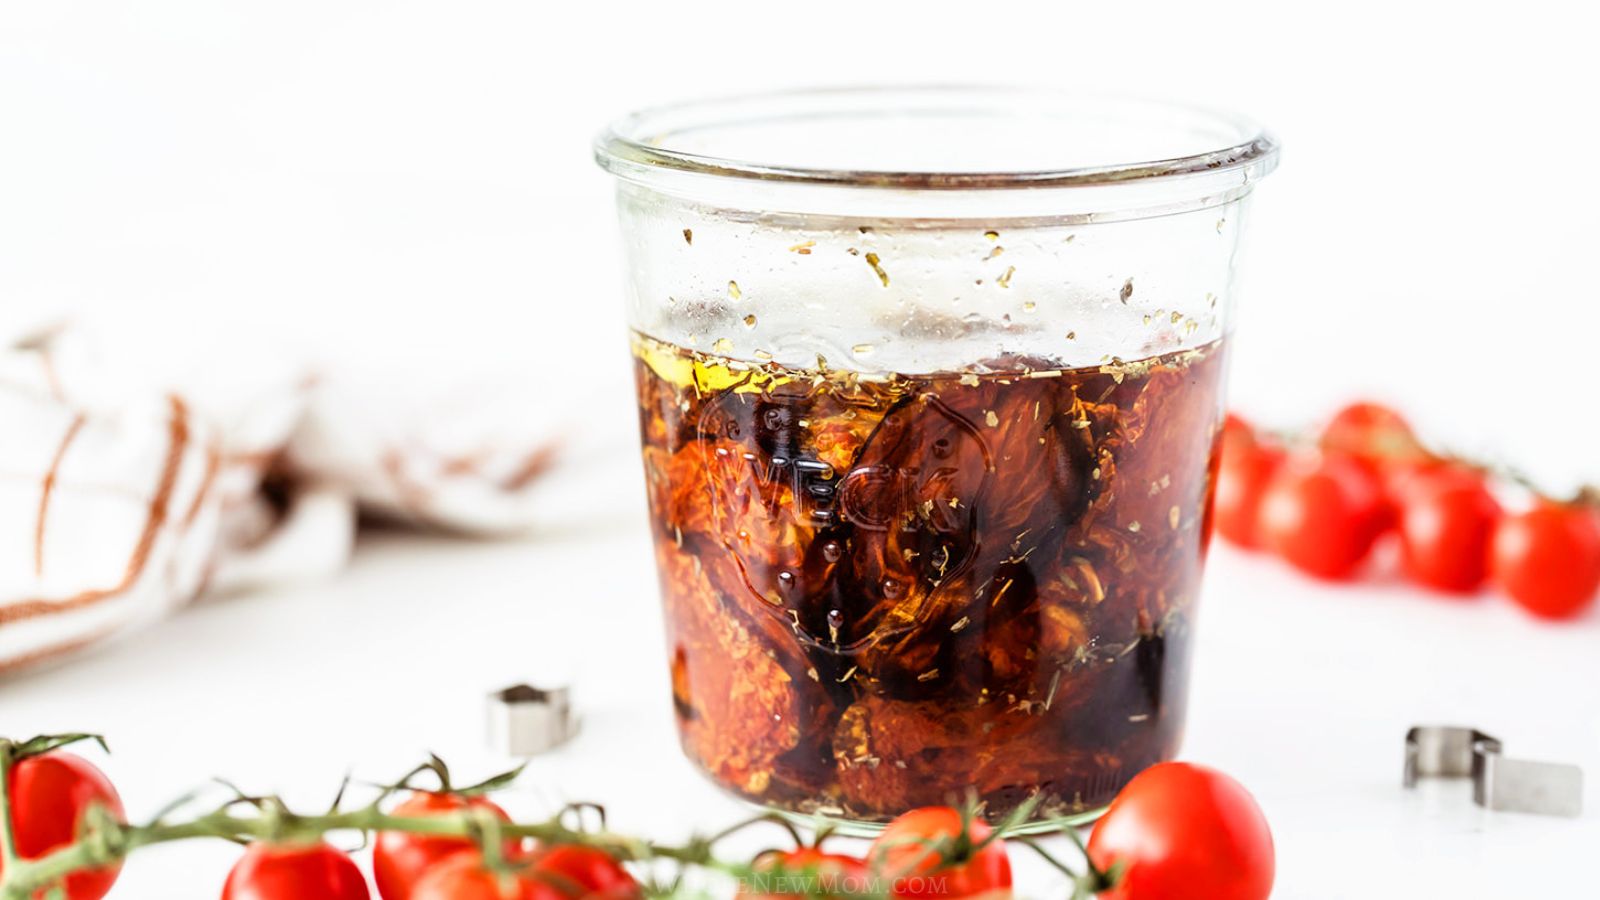
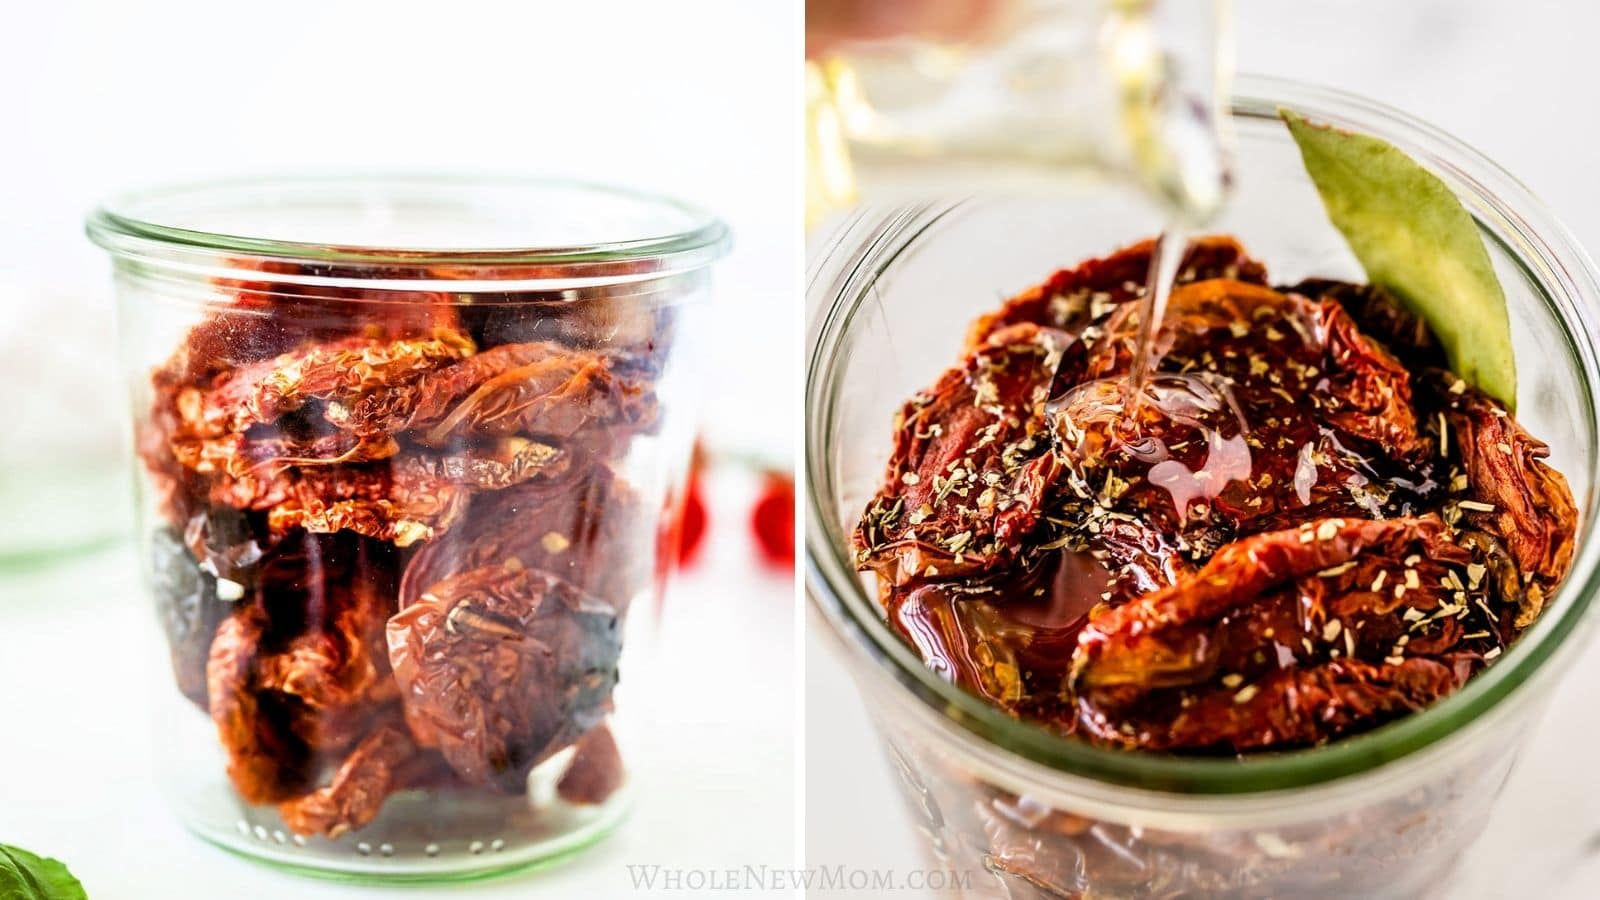
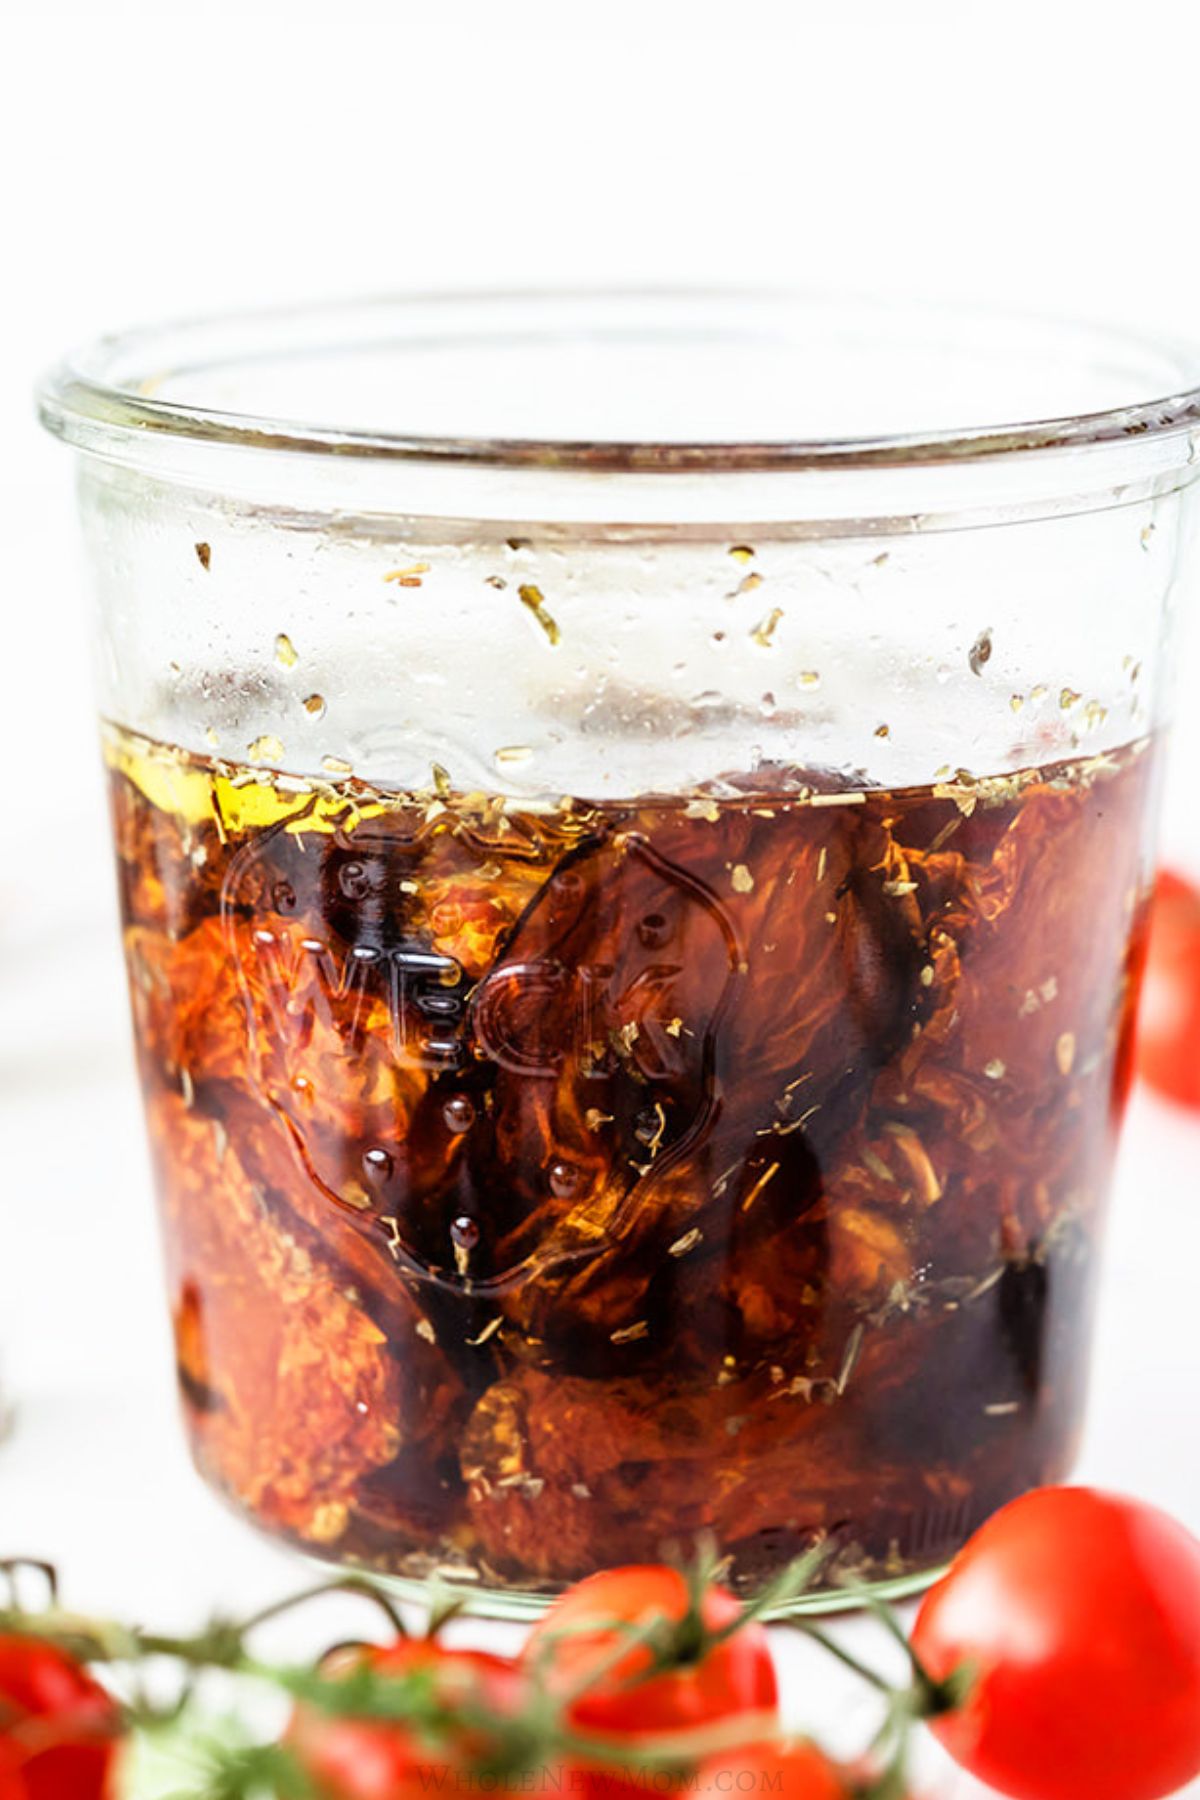
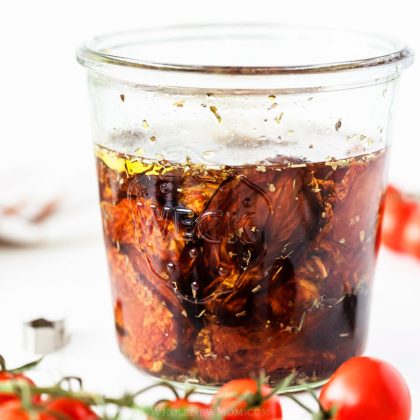
- Refrigerator: Refrigerate sun-dried tomatoes in a jar with enough oil to cover. They'll last for up to a week or two. If you want jarred tomatoes but won't be using them quickly, store the tomatoes in the freezer and move them in small batches to a jar with oil and desired seasonings. The more you dry your tomatoes, the longer they'll keep. I've made super dry tomatoes and eaten them years later!
- On the Shelf: If you dry your sun-dried tomatoes thoroughly, you can store them in a bag or other container for quite a while, like this.
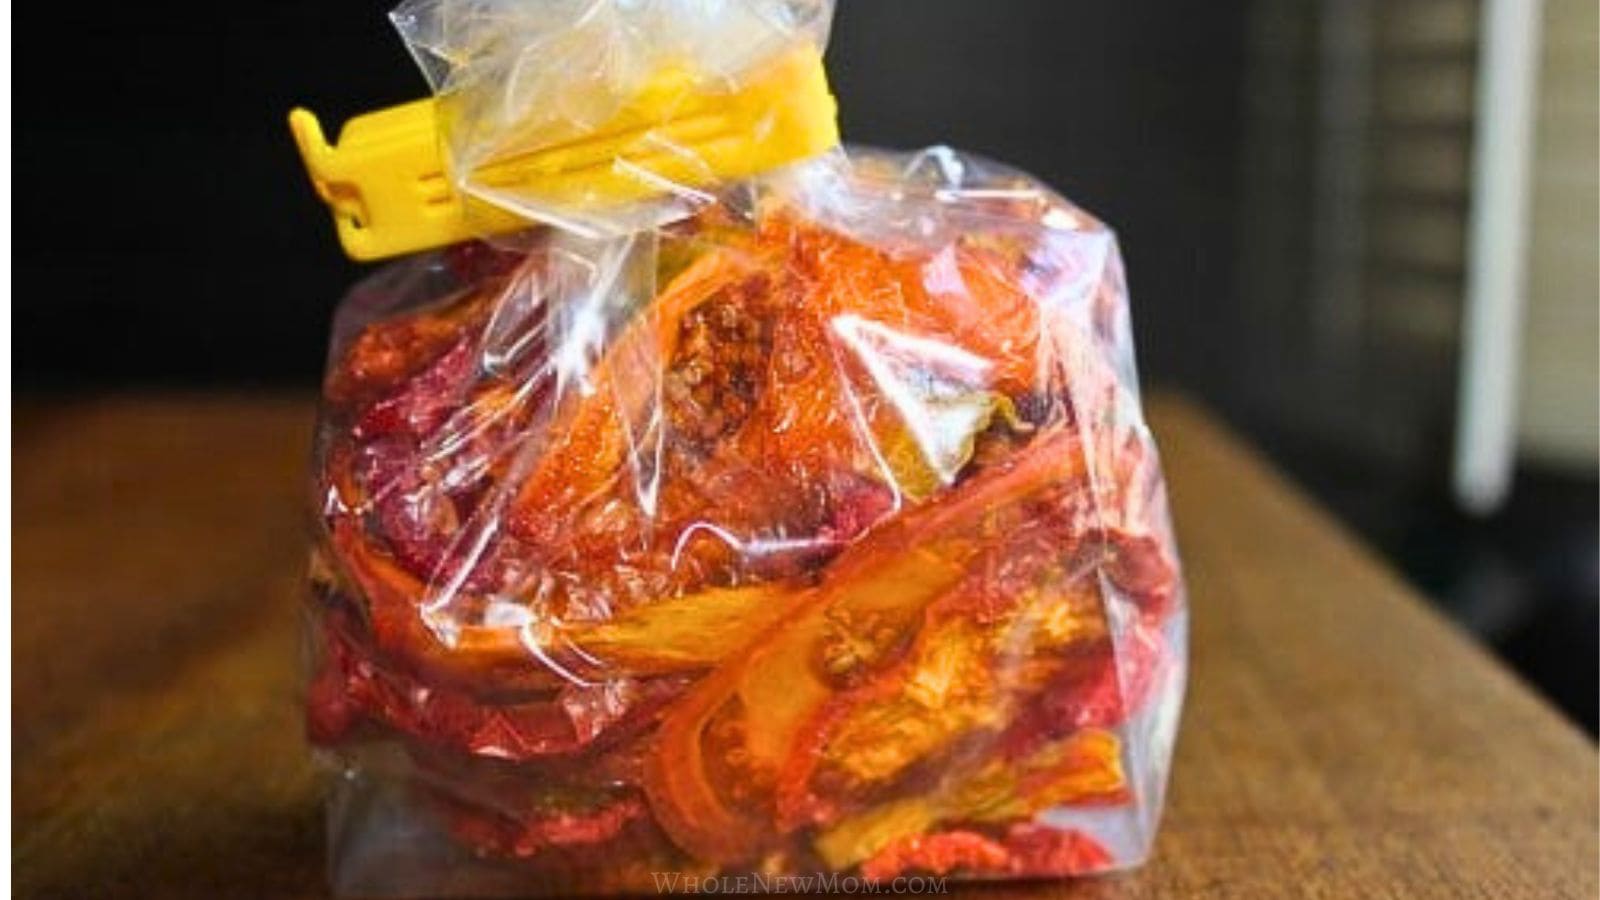
I use these clips and bags for everything!
Freezer: Place dried tomatoes on a tray in the freezer until frozen. Then put them in a freezer-safe bag with the air removed until you want to use them. I personally like using this type of bag or a bag similar to this smaller version with these clips for sealing. They'll last up to a year but will taste the best within 3 months. If you want to freeze your tomatoes in oil, put them (whole or pieces) in ice cube trays with enough oil to cover. Pop frozen cubes into bags and store in the freezer.
How to Rehydrate
To rehydrate, simply soak them in warm water, broth, or wine until soft. Remove from water, pat dry, and use according to recipe directions.
Note: If you store your dried tomatoes in oil, they'll plump up in the oils and won't really need to be rehydrated.
How to Use Homemade Sun-Dried Tomatoes
There are so many different and tasty ways to use sun-dried tomatoes. Try them in:
- Quiches, omelettes, or frittatas
- Pizzas (on top or in the crust)
- Pastas (Chicken and Sun-Dried Tomato Pasta)
- Pestos
- Biscuits (like these Healthy Drop Biscuits)
- Sandwiches
- Sauces
- Main dishes
- Dressings (simply add to dressings like this Moroccan Vinaigrette)
- Savory muffins (like these Oat Bran Muffins)
- Breads (like this Focaccia Flax Bread)
- Salads (like this Broccoli Salad with Avocado Dressing)
- Soups (like this Creamy Vegetable Root Soup)
- And more!
Seasoning Options
Even though homemade sun-dried tomatoes taste amazing plain, adding different herbs and seasonings makes them even better. Technically, you can season before, during, or after drying, but it's easiest to do it before.
IMPORTANT TIP: Only use dried herbs and seasonings on your sun-dried tomatoes if adding them after drying. Fresh herbs will cause the mixture to spoil quickly.
Here are some great options:
- Herbs: rosemary, basil, paprika, Italian seasoning, onion powder, herbes de Provence, oregano, thyme
- Spicy: crushed red pepper flakes
- Garlicky: garlic powder or dried minced garlic
- Unique Options: This Vegetable Broth Powder would taste amazing. Skip adding additional salt, however, if you use this.
Notes About Outdoor Sun-Dried Tomatoes
If you really want to have the true, time-honored experience of sun-drying tomatoes, here's how to do it. It's mighty handy if your power goes out and you have a boatload of tomatoes or for a fun experiment, but it's a little tricky.
- You need consistently warm, dry conditions. Humid conditions make the process take much longer, can be really difficult, or simply not work at all. I've lived most of my life in more humid climates, so that's why I've never done this myself.
- To avoid creating a critter picnic with your precious tomatoes, lay a piece of cheesecloth over your tomatoes while they're drying.
- Be sure to bring your tomatoes inside at night.
- This method takes the longest: anywhere from a couple of days to weeks.
- Blowing a fan on the tomatoes will help them dry faster and help keep bugs away.
- Sun-drying in a greenhouse is a great option because the higher temperature will help with drying speed.
- There are lots of screen drying options, both for purchase and DIY.
Recipe Notes and Tips
- Roma tomatoes: Some say you need to hollow this type of tomato out before dehydrating them, but I've never done this. Instead, you can press down on them during drying or make sure to cut Romas (or any tomato) into 1/4-inch slices and they'll dry well with no waste!
- Cutting your tomatoes as uniformly as possible is helpful to have them dehydrate at the same rate.
- Check the tomatoes while they're drying to make sure they're drying at the same rate and don't burn (if using an oven).
- Dehydrator recommendations: I love this dehydrator, but this dehydrator is a good lower-priced option.
- Dehydrator Temperature: You can dry the tomatoes at higher or lower temperatures, but I use 125°F all the time since this is low enough for the dehydrated foods to still likely be “raw,” but they will dehydrate faster than at lower temps.
- Oven Tip: If desired, you can flip the tomatoes in the middle of the drying time (around the 2-3 hour mark) to make things move a little faster.
Homemade Sun-Dried Tomatoes
Ingredients
- 3 pounds tomatoes (use as many tomatoes as you would like to process)
- salt (optional; to taste)
- olive oil (optional; to taste)
- dried or fresh herbs (optional; to taste)
Instructions
Dehydrator Method (Preferred)
- Prepare tomatoes by washing.
- Slice tomatoes as uniformly as possible to a maximum of 1/4" thickness.
- If using olive oil, herbs, and salt before dehydrating, put the tomatoes in a bowl, add the oil, herbs, and salt on top of the tomatoes, and toss gently to coat.
- Spread the tomato slices on dehydrator sheets in a single layer.
- Place the dehydrator trays in the dehydrator.
- Set the dehydrator to 125°F or desired temperature, and dehydrate until dry but still pliable, usually 8–24 hours depending on thickness and humidity.
- The tomatoes are done when they are dry but still pliable (not moist or sticky).
Oven Method (Alternative)
- Instead of using dehydrator trays, place the tomato slices or wedges on baking sheets with parchment.
- Set the oven to its lowest temperature and place the trays in the oven.
- Bake until dehydrated, flipping half way through if desired, and check the tomatoes often to prevent burning.
Notes
- Slice the tomatoes uniformly (about 1/4 inch thickness) so that they dry at the same rate.
- Check during drying (especially in the oven to avoid burning).
- Oven tip: flip halfway if desired for more uniform and faster drying.
- Dry until pliable for regular sun-dried tomatoes, or dry longer for extended storage.
- For traditional sun-drying instructions, see the information in the post.
Nutrition
Nutritional information is provided as a courtesy and is merely an approximation. Optional ingredients are not included and when there is an alternative, the primary ingredient is typically used. We cannot guarantee the accuracy of the nutritional information given for any recipe on this site. Erythritol carbs are not included in carb counts since they have been shown not to impact blood sugar. Net carbs are the total carbs minus fiber.
What are your favorite ways to use sun-dried tomatoes?
My wife made these–they’re amazing!!!! Thank you, Whole New Mom for these incredible recipes!!!
Thank you! And you’re welcome :).
I have had a hard year in the garden, what with the triple digit temp, no rain or water (well died in Aug). Lost all but 3 of my heirloom Italian tomato plants. Was able to keep the 3 alive with grey water from washing. But they did spring back to life once the well got drilled and was up and running again. My 3 plants grew and put forth a worthy harvest in spite of everything! I am currently running an experiment in my small greenhouse (Palram 6×10 Mythos greenhouse). I have pulled the three plants and have them suspended from the interior roof and allowing them to dry. I am not cutting or slicing them. They are all small cherry/grape tomato size. They have been ripening quite well, every day they are more red. What do you think? It is still getting up to 80 in the greenhouse and here in New Mexico humidity is low (even in the greenhouse)……will the experiment yield me some precious dried fruit?
Hi there – you’re letting them dry whole in there?
I haven’t done it, but I have read about sun drying in a vehicle in the summer to prevent pests from getting to the objects being dried.
I’ve heard about that too! I bet the car would smell really great for awhile! LOL! I wonder about it being in something with all that plastic though…hmmmmm…..What do you think?
What plastic? I have a jeep, almost all metal…..
I mean the interior…are Jeeps all metal still? I’m thinking vinyl dash…maybe not a big deal, but I’m thinking about the inner components.
I didn’t know this but I just looked it up and this was on a site that came up first:
“Many modern car interior parts are made with polymer, including lightweight seats, instrument panels, durable upholstery, sound control fabrics, the headliner, dash, and door panels.”
Side note – I had a Jeep YEARS ago. Loved it, but it was a lemon. I sold it at a loss. Still breaks my heart. I have heard that they are not great for reliability, but I loved it!
Just the dash is plastic. The roof and sides to the metal is fiberglass…and glass of course for the windows.
And, no, I wouldn’t worry about it if I sun dried in it. The food isn’t going to touch the plastic, and it is old enough that off-gassing has already happened, plus I’d put it in the back where it is furthest away from the dash and seats.
Mine is a 2004 Wrangler that is Right Hand Drive, (I delivered mail in it for years, but am now retired) is kind of a lemon too, but I LOVE it.
I joke with my mechanic that soon I’ll have a totally new, rebuilt ‘guts’ as I will have replaced everything at least once! I replaced the tinny sounding horn THREE times! Engine twice, tranny 3 times (normal for mail delivery as the start/stop is horrible!) But still, it has over a total of 300K on it.
I have had offers to buy it for years, and it’s worth about 20K (just checked out the prices recently)
Yeah I hear you on the plastic – likely OK. I don’t think moving to the back would help b/c the gasses (if any) are trapped inside. I love that you love it. I lost so much money in mine b/c I moved overseas and didn’t know what else to do with it. I was totally taken advantage of :(. Boo on people like that.