Homemade Sugar-free Marshmallows
This post may contain affiliate links from which I will earn a commission. Learn more in our disclosure.
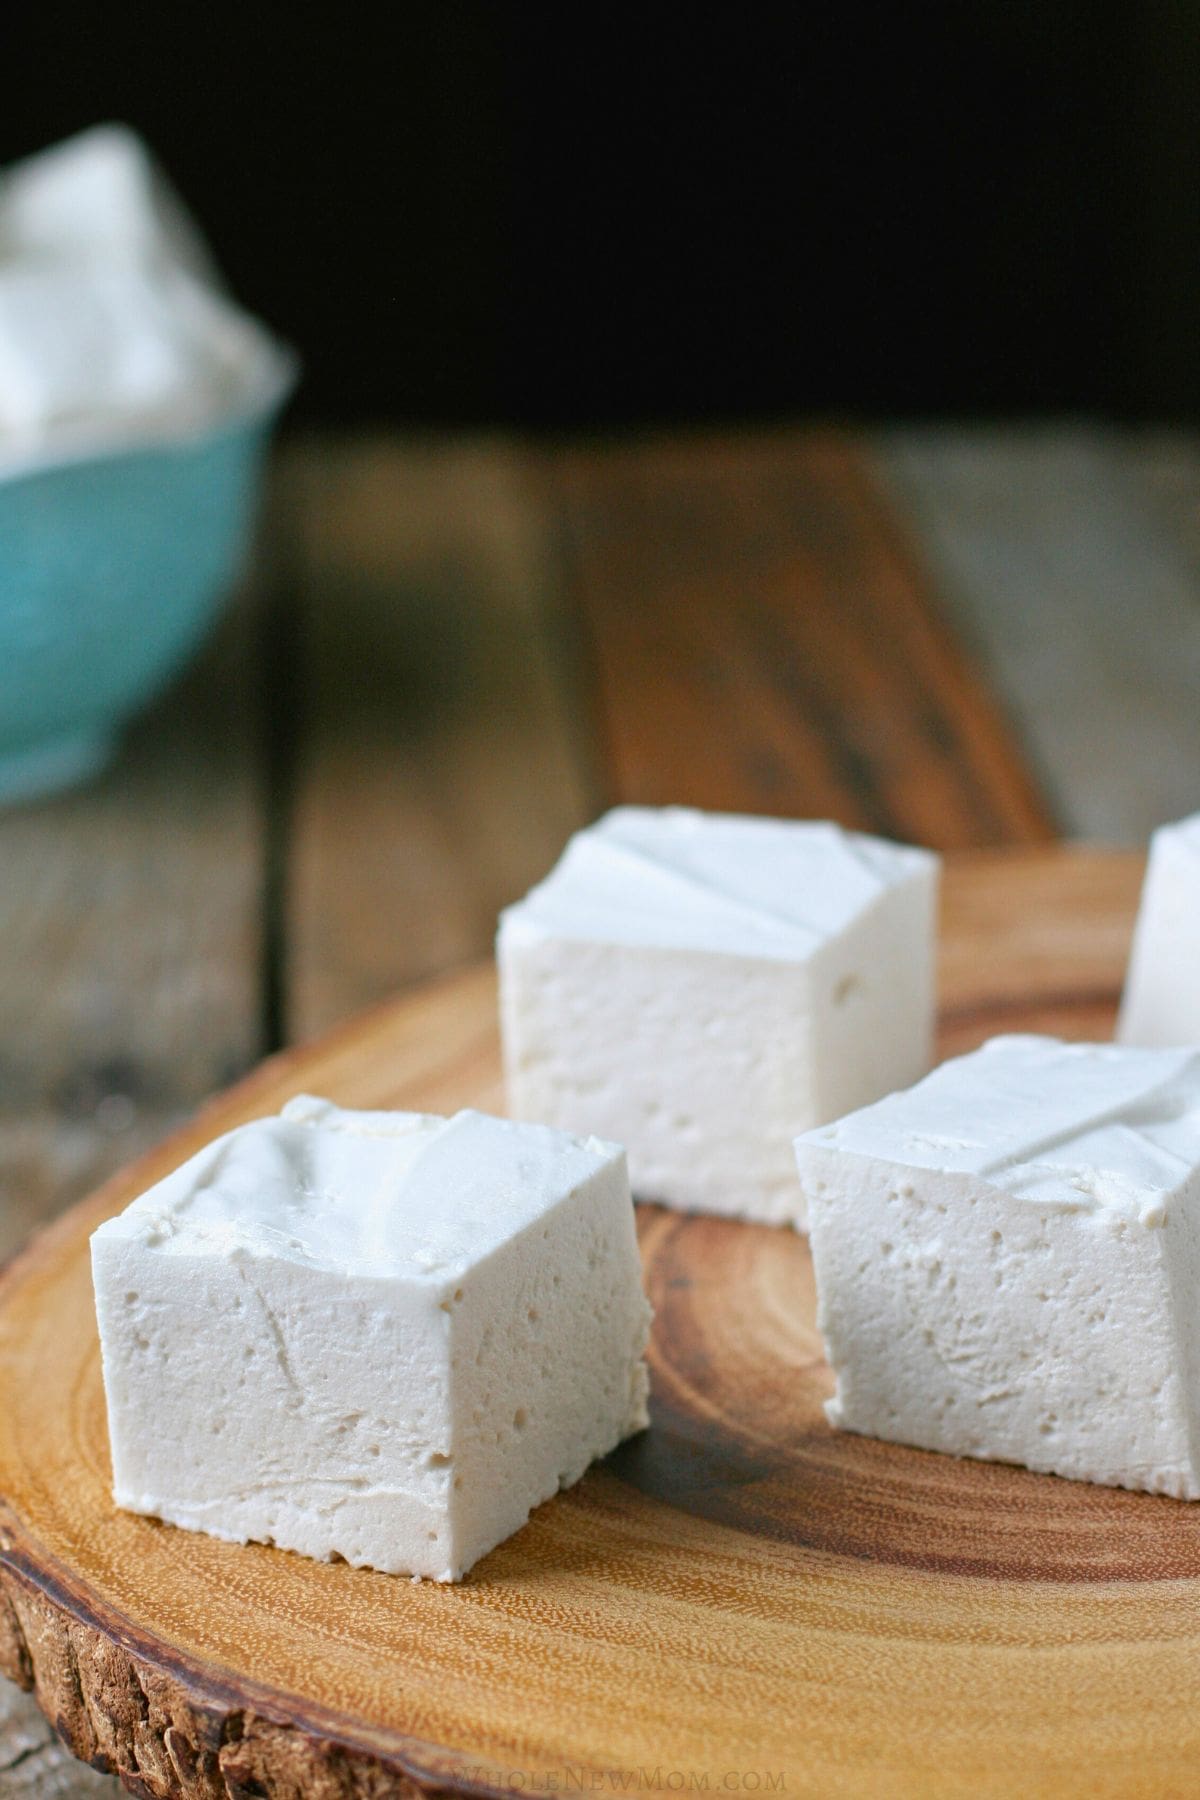
These sugar free marshmallows are light, fluffy, and easy to make. They’re a great alternative to store-bought marshmallows when you want a sweet treat without all the sugar.
They’re perfect for hot cocoa, snacking, or homemade s’mores—and you can adjust the sweetener to fit your dietary needs.

If you’ve ever wondered whether you can make marshmallows without sugar, the answer is yes—and they’re surprisingly delicious.
Making marshmallows at home is also a lot of fun. It’s amazing to watch a simple mixture transform into thick, glossy fluff and then set into soft, pillowy squares that taste even better than the packaged kind.
I love fun treats, but store-bought marshmallows often contain a lot of sugar and unnecessary additives. Making them at home gives you full control over the ingredients.
We used to make these marshmallows with sugar, but now that we've gone low-carb, those days are over. But you can substitute the low-carb sweetener with a regular one if you'd like.
I love making these marshmallows with our sons. What fun to see water, sweetener, and gelatin turn into white fluffiness in a bowl, and then seeing them turn into marshmallows that tasted much better than anything I'd ever bought in a bag.
Why Make Homemade Marshmallows
- Control the ingredients: Skip additives, dyes, and sweeteners you’d rather avoid.
- Lower sugar option: A great alternative to traditional marshmallows when you want a sweet treat without all the sugar.
- Flexible for special diets: Works for low-carb, keto, paleo, and more depending on the sweetener you choose.
- Fun to make: Watching the mixture whip into fluffy marshmallow is part of the magic.
- Perfect for treats: Great for hot cocoa, s’mores, or just enjoying on their own.
- Save Money: Sugar-free marshmallows cost a small fortune. Making them at home is so much less expensive.
We’ve even used these to make homemade s’mores (using homemade chocolate bars), and they were a huge hit with an organic skincare expert and friend who was visiting from Australia. She'd never had s'mores before!

Why This Recipe Works
- Uses allulose for proper structure: Helps create a soft, fluffy texture similar to traditional marshmallows
- No egg whites needed: Keeps the recipe simple and more allergy-friendly
- Balanced liquid ratio: Allows the marshmallows to whip up thick and set properly
- Whips to the right consistency: Creating that classic glossy, stable marshmallow texture
Best Sweetener for Sugar Free Marshmallows
Allulose works best for making sugar free marshmallows because it creates a soft, fluffy texture and allows them to melt and brown more like traditional marshmallows.
If you prefer a sweeter result, you can use an allulose blend (such as allulose combined with monk fruit or erythritol), but the texture may be slightly firmer.
Erythritol alone is not recommended, as it can result in a firmer, less smooth texture.
Frequently Asked Questions
Will These Sugar Free Marshmallows Roast?
Yes—if you make them with allulose, they can actually roast and brown nicely. They do tend to soften and brown more quickly than regular marshmallows, so keep a close eye on them.
Most other low-carb sweeteners will not roast the same way, though they can still get soft and gooey.
Can You Make Marshmallow Shapes?
Yes! These marshmallows work well in silicone molds.
Lightly grease the molds, then spoon or pipe the marshmallow mixture in. Let them set fully before removing.
Can You Use Other Sweeteners?
You can experiment with different sweeteners, but the results will vary.
Allulose typically gives the best texture and roasting performance. Erythritol alone does not work well, so it’s best to start with the sweetener recommended in the recipe.
What Kind of Gelatin Is Best?
Look for a high-quality, grass-fed gelatin if possible. This helps give the marshmallows the best texture, structure, and nutrition.
Substitutions for Special Diets
- Vegan option: Agar may work in place of gelatin, but I haven’t personally tested this version, so results may vary.
- Sweetener options: Different sweeteners can work, but texture and sweetness level will change. See recipe notes for best results.
- Glycerin substitution: Another sweetener may work in place of glycerin depending on the version, but some experimentation may be needed.

Flavor and Coating Variations
It’s easy to customize these sugar free marshmallows with different flavors and/or coatings.
Cocoa Marshmallows
For a light chocolate flavor, add 1–2 tablespoons cocoa powder when mixing in the vanilla. You can also dust the finished marshmallows with cocoa powder for a richer chocolate coating.
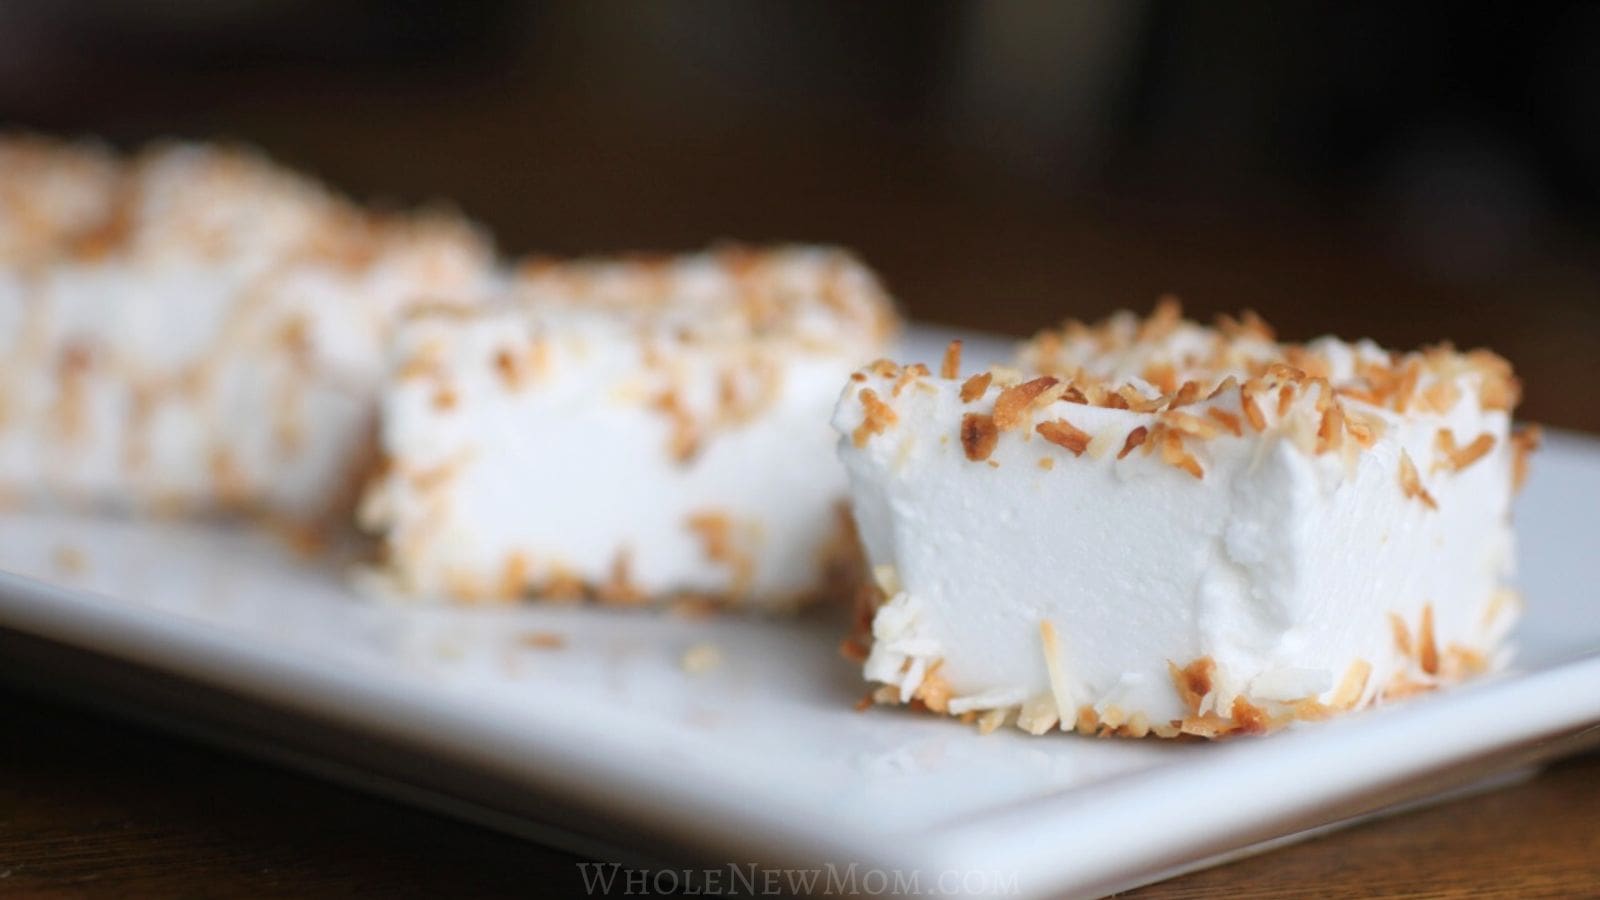
Coconut Marshmallows
Roll or sprinkle the finished marshmallows with unsweetened shredded or toasted coconut for extra texture and flavor. This works especially well for a slightly firmer, less sticky exterior.
Berry Marshmallows
For a naturally flavored option, grind freeze-dried berries (like strawberries, raspberries, or blueberries) into a fine powder using a spice grinder. Either mix the powder into the marshmallow mixture at the end of whipping or dust it over the finished marshmallows for a light fruit flavor and a nice burst of natural color.
Start with a small amount and adjust to taste, as freeze-dried fruit powders are concentrated.
Powdered Sweetener Coating
Lightly dust the marshmallows with powdered low-carb sweetener to prevent sticking and give them a classic look.
Mixed Coatings
Try combining coatings for variety—some plain, some cocoa-dusted, and some rolled in coconut. This is a fun option for serving or gifting.
Ways to Use Sugar Free Marshmallows
- Add to hot cocoa
- Make homemade s’mores
- Enjoy as a snack
- Cut into smaller pieces for dessert toppings, like on pudding or ice cream, or add to cookies or chocolate bark.
More Homemade Healthy Pantry Recipes
If you like this recipe, you'll likely enjoy these recipes too!
- Powdered Sugar / Powdered Sugar Substitute
- Powdered Egg-Replacer (like Ener-G)
- Homemade Taco Seasoning
- Soft Pumpkin Cookies (these taste amazingly like Enjoy Life)
- Homemade No Bake Almond Joy Bars
These sugar free marshmallows are easy to make with just a few simple ingredients. Do make sure to review the notes below for the best texture and results, especially when choosing your sweetener.

Sugar-free Marshmallows
Ingredients
Instructions
- Add the cold water to a large mixing bowl. Sprinkle the gelatin evenly over the top and let it sit for 5–10 minutes to bloom.
- In a small saucepan, combine the allulose and hot water. Heat over medium heat, stirring until fully dissolved. Continue heating until the mixture reaches 240–245°F (soft ball stage).
- With the mixer running on low speed, slowly and carefully pour the hot mixture into the bloomed gelatin.
- Increase speed to high and beat for 8–12 minutes, until thick, glossy, and fluffy. The mixture should hold its shape and form soft peaks.
- Mix in the vanilla extract (and salt, if using).
- Beat on high until the mixture form stiff peaks (almost like beaten egg whites).
- Pour the mixture into a lightly greased or parchment-lined 8×8 pan, or into molds. Smooth the top quickly, as it will begin setting fast.
- Allow the marshmallows to set at room temperature for several hours, or until firm. You can refrigerate to speed this up, but avoid freezing.
- Cut into squares using a greased knife. If needed, lightly dust with powdered sweetener or starch to reduce stickiness. Dusting with cocoa powder will do the same and will add nice flavor as well.
- Store in an airtight container and try to keep your kiddos out of them!
Notes
- Use allulose for best results: It creates the softest texture and allows the marshmallows to melt and brown more like traditional ones.
- Whip until thick and glossy: The mixture should hold its shape before transferring to the pan.
- Work quickly: Marshmallow mixture sets fast once whipped, so pour it into the pan or molds right away.
- Grease well: Lightly oil your pan, spatula, and utensils to prevent sticking.
- Let fully set: Allow to set in mold or pan for several hours for best texture and clean cutting.
Nutrition
Nutritional information is provided as a courtesy and is an estimate only. It may vary depending on ingredient brands, substitutions, and preparation methods. Optional ingredients are not included. Net carbs are typically calculated by subtracting fiber and sugar alcohols (such as erythritol) from total carbohydrates. This information should not be relied upon for medical or nutritional purposes.
Tips for Perfect Sugar Free Marshmallows
- Use the right sweetener: Allulose gives the best texture and allows the marshmallows to brown when roasted. Other sweeteners may not perform the same.
- Whip long enough: The mixture should become thick, glossy, and hold its shape. This is key for that classic fluffy texture.
- Work quickly: Once whipped, the mixture sets fast, so transfer it to your pan or molds right away.
- Grease everything well: Marshmallow mixture is very sticky—lightly oil your pan, spatula, and even your hands if needed.
- Let them fully set: Give the marshmallows enough time to firm up before cutting for clean edges.
Are you a S'more or marshmallow lover too?
Hey! I am really wanting to try this but I am trying to do with what I have handy. Do you think I sub Sugar free maple syrup for the vegetable glycerin? I apologise if you have already answered this, I am just super excited as my family is meeting up for a camping trip soon and I am the only keto person, so if I want to fit in for s’more time I need to make/bring my own mellows! Thank you for the wonderful recipe, have a wonderful holiday season!
Yes, should work! Sounds really really interesting! Let me know! I haven’t answered that and it’s OK regardless!
Hi!
Can I use stevia in place of the vegetable glycerin? If so how much? I’m on THM but also try and avoid the sugar alcohols, if possible.
Typically you would use 1/32 tsp of stevia for 2 T of glycerine. The marshmallows work but they do come out a bit odd. Worth trying though :).
Hi, I don’t have a candy thermometer. Will I be able to make these without one?
Thanks!
You can test some syrups about what stage they are in with other tests – I haven’t done it w/ sweeteners other than sugar, however.
Thank you for this post! Will honey work in this recipe?
Yes!
Thank you for great recipes! Was so excited to make these I have them in freezer but I never got peaks. Used my stand mixer for more than 15 minutes – made a mess. I followed recipe exactly. I used swerve granular for my sweetener and now glycerin.
Anyone else not get peaks?
I have never had a problem. Maybe it was warm in your home and needs a bit longer? I have never used swerve but I’ve used several sweeteners.
I was going to use liquid stevia drops and Pyure (erithrytol and stevia powder blend) for this but I am a little lost on how much to incorporate. I don’t want to mess this up!!! ?
I haven’t done conversions with Pyure – haven’t ever used it. I would recommend looking at their conversion charts and making a good guess and going by taste. I think you will do OK :).
Hello, I’d love to try these, but I’m a little confused.
You note that you can sub 1/2 C. for the 1/2 C. liquid sweetener, but wouldn’t this throw off the wet to dry ratio? Or does it not matter with this recipe?
Thanks! 🙂
Shouldn’t matter w/ this recipe. I’ve tried it many ways. Enjoy!
I would love for you to make a video of you making these! Any chance of that?
will work on that! So sorry for the delay in responding. I have so many comments I’m trying to weed through!
Can you use these to toast over a campfire?
They don’t roast well but they do soften and make good enough marshmallows for s’mores.
Hi again, Candy – I just read that you can let them dry for a few days and that allows them to roast. I’m going to try it!
I made these with Lakanto classic sweetener and they were awesome. No after taste like stevia.
YUM!