
Easy Dairy-Free Sugar-Free Chocolate Ice Cream
This post may contain affiliate links from which I will earn a commission. Learn more in our disclosure.
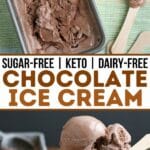
This Sugar-Free Dairy-Free Chocolate Ice Cream is rich, creamy, and deeply chocolatey, yet it's made with just a handful of simple ingredients. If you're looking for an easy homemade chocolate ice cream without dairy or refined sugar, this recipe delivers all the creamy texture you want with very little effort.
Whether you're using an ice cream maker for the first time or you're a homemade ice cream regular, this recipe comes together in just minutes before churning.

Why You'll Love This Ice Cream
This ice cream recipe is
- simple to make, taking just minutes aside from the freezing time
- made from nourishing ingredients
- suitable or adaptable for almost every special diet
- amazingly rich and creamy

We make this healthy chocolate ice cream often. No need to run to the store and buy spendy pints when you can have this made super fast without a long list of specialty ingredients.
I love that I can make a healthy treat for my family in just about no time and for very little cost.
Ingredients
Here's a list of the super simple ingredients needed for this recipe. See the recipe card for amounts needed and directions.
- Coconut milk: using a quality full-fat coconut milk yields a creamy result
- Cocoa powder: I like using a dark cocoa for rich chocolate flavor
- Stevia: gives sugar-free sweetness to this recipe. You can use any sweetener you like.
Ice Cream Maker Tips
I've made this recipe successfully in a Cuisinart Ice Cream Maker, a Breville compressor model, and even the Ninja Creami.
For traditional ice cream makers, chilling the mixture first helps it freeze faster and produces a thicker, creamier texture.
Homemade dairy-free ice cream is delicious served right after churning as a soft serve. If you prefer a firmer texture, freeze it for a few hours, then let it sit at room temperature for about 10–15 minutes before scooping.
If it gets too hard to scoop, try this handy anti-freeze ice cream scoop.

Recipe Notes and Substitutions
- Cocoa: If you like, you can also use raw cacao instead of cocoa, or use carob powder for AIP. If using carob, you might want to reduce the sweetener.
- Stevia Extract Alternatives: About 95 drops of liquid stevia can be used instead of the stevia extract. Also, you could use 9 1/2 tablespoons honey or maple syrup, or coconut sugar for AIP. Any other sweetener can be used as well depending on your preference.
- Serving Tip: Freshly churned, this ice cream has a soft-serve texture. After freezing, let it sit at room temperature for about 10–15 minutes before scooping for the best texture.
So what are you waiting for? Pull out your ice cream maker and whip up a batch of this tonight. For more fun, top it with this Homemade Magic Shell or even this Sugar-free Blueberry Sauce (or both!) for a fantastically chocolate treat.

Sugar-free Dairy-free Chocolate Ice Cream
Ingredients
- 2 cans full-fat coconut milk (13.5 ounces each)
- 7/8 cup cocoa powder
- 1/4 teaspoon stevia extract (or alternative. See notes.)
- 1 dash vanilla
- 1/2 teaspoon salt
- 2 1/2 teaspoons lemon juice (optional; for brighter chocolate flavor)
Instructions
- Chill coconut milk prior to starting, if possible.
- Blend all ingredients until smooth.
- Chill if needed (depending on your ice cream maker).
- Churn according to your manufacturer's directions.
- Enjoy immediately as soft serve, or freeze for a firmer texture.
Notes
- Coconut milk: Use full-fat canned coconut milk for the creamiest results.
- Cocoa Powder: Dutch-process, natural cocoa powder, or cacao powder all work well. Dark cocoa gives the richest chocolate flavor.
- This recipe was developed using stevia extract, but you can use your favorite sweetener instead. Start with the equivalent of ¾ to 1 cup of sugar, adjusting to taste. If using a granulated sweetener, blend it first for the smoothest texture.
- Honey: about ¾ cup
- Maple syrup: about ¾ cup
- Coconut sugar: about 1 cup
- Granulated sugar or a 1:1 sugar substitute: about 1 cup
- Serving: Homemade dairy-free ice cream freezes firmer than store-bought. Let it sit at room temperature for 10–15 minutes before scooping.
- For Softer Ice Cream: If you'd like a softer texture after freezing, you can add 1 tablespoon vodka, 1–2 tablespoons MCT oil, or 2–4 tablespoons allulose before churning. These are optional and aren't necessary for a delicious result.
- Serving: Homemade dairy-free ice cream freezes firmer than store-bought. Let stand 10–15 minutes before scooping.
- Optional: For an even softer texture after freezing, add 1 tablespoon vodka or 1–2 tablespoons MCT oil before churning.
- For a softer ice cream that stays scoopable after freezing, add 2–4 tablespoons allulose.
Nutrition
Nutritional information is provided as a courtesy and is an estimate only. It may vary depending on ingredient brands, substitutions, and preparation methods. Optional ingredients are not included. Net carbs are typically calculated by subtracting fiber and sugar alcohols (such as erythritol) from total carbohydrates. This information should not be relied upon for medical or nutritional purposes.
I'd love to hear what you think about this recipe after you've made it!
Why do you put lemon juice in since you’re making chocolate ice cream?
Hi there! Good question! Basically it can offset the stronger chocolate flavor or enhance it. Let me know how it goes but the same principle applies to this fudgesicles recipe.
Great! Do you use a high powered blender or regular? Thanks!
I use a high powered but you could technically use either!
Is it okay to sub the Hershey’s unsweetened cocoa powder? Thank you in advance!
Do you mean can you use Hershey’s instead of whatever is linked to?
Yes, I have unsweetened cocoa but it’s not the same brand. Would it still work?
Yes of course – all cocoas are different and I personally LOVE the one that we use but yes, they are all interchangeable. Hershey’s is more mild than what I use but the photos were using a less dark cocoa. Hope it works well!
Thanks so much!!
You are so welcome!!
Could Avocado oil, Olive oil or Coconut oil sub for MCT oil?
I think that would work–just added notes in the recipe mentioning that. I wouldn’t do olive, however, because it has a heavier flavor. Enjoy!
Do you have to process this through an ice cream maker? Trying to find an ice cream recipe without needing the machine.
Technically you can make any ice cream without a maker. You just have to do it right. One idea is to just put it in a pan and place in the freezer and stir every 30 min or so. Hope it works well for you! It won’t be as good but should work!
my favorite flavor of ice cream is chocolate and villnala
Can you use the frozen setting on vitamix to make ice cream
Yes, but you need frozen cubes / fruit to do so.
So is the gelatin only for texture purposes? I’m trying to go with items I already have at home without an extra shopping trip! And guess which one item I don’t have? LOL!
Yes, it is only for texture but it adds a little protein. You can add about 1 T of vodka if you like to keep it from getting too firm in the freezer.
I’m probably going to freeze it in silicone baking cups for portion control or as popsicles, so not too overly concerned with how hard it is. Means it’ll not melt as fast! 🙂
Sounds great – I just will say that ours froze really really hard so it would probably be a good idea. We typically eat it all, though :).
I have a question regarding the sweeteners and one regarding the gelatin…we can’t use stevia so I was wondering if you could estimate amounts of the coconut sugar (as that is what we would most likely use) or maple syrup. As far as the gelatin, I have both the kind that works in hot things and the one for cold things, so if I used the “cold” variety could I skip the heating of the 1/4 cup of coconut milk? This would greatly help to know! Thanks much!
This post should help w/ the stevia. https://wholenewmom.com/kitchen-tips/stevia-what-it-is-and-how-to-use-it/ Coconut sugar is 1:1 with sugar.
Maple syrup is about the same.
I would not do the collagen – you want the gumminess of the gelatin to make it work w/ the ice cream. Otherwise you are just adding protein and not the “gummy” properties. Hope that helps!
Thanks much for your speedy reply! I did read the post, but unfortunately I could never find info on exactly how to convert the tsp of Stevia to sugar – it talked about scoops rather than tsp. Am I missing something obvious? 🙂
Sorry – I will try to make the post more clear. 1/32 of a tsp of stevia extract is equivalent to 2 Tbsp of sugar.
Hi there – Thank you for the recipe, but I’m having issues with coconut milk and wonder if this will work with tigernut milk? I’ve just started making this and love the taste. Just a thought for those of us with coconut/almond issues! Your thoughts would be very helpful.
Hi Louise. Yes, I think it would. I was thinking about trying that. Higher in carbs but I bet it would be yummy. I will add it to the post. Thanks!
Thank you for replying so quickly. You are a real blessing to all us recipe challenged people out here. Thank you so much.
You are so welcome. You made my day. I was honestly doing a lot of questioning about the blog and such….so thank YOU for coming back to comment. Enjoy the ice cream! I have some tiger nut flour here. I need to make something with it soon. I LOVE the nuts myself.
I just love that you can use the “meal” just like the flour after you make the milk (I made pancakes with it the next morning) – it’s amazing! Good luck with your experimenting. Keep up the great work 🙂
Thank you!! So you blend the nuts in the water and use the leftovers that you get out w/ a nut milk bag?
Yes, 2 cups (soaked for 24-48 hours in refrigerator) tigernuts. Rinse well after soaking. Place in high speed blender with 2 cups water. Blend for 2-4 minutes. Strain in nut milk bag until almost all moisture is out. Do this up to 3 times to get the most out of the tigernuts. Then place in a container in fridge and use as any other milk. Store the “meal” in a container in the fridge and use in recipes that use the flour or in you smoothies.
I find the meal is much better in my recipes because I found the flour “gritty” for some reason! Saying this, I’ve only made the milk twice now, but plan on much more as I’ve just bought 2 more bags of tigernuts.
Hope this helps.
Great! Do you use a high powered blender or regular? Thanks!
Sorry, I should say that you should use filtered water in all cases above.
I use my Ninja Kitchen blender for mine – am on a fixed income so can’t afford one of the big guys (Blendtec or Vitamix). I’m sure it doesn’t matter as long as you use a high powered one though. The meal should be very fine.
Good to know – thanks!
You mention subbing 2/5 teaspoon powdered stevia for the liquid stevia. Since I don’t have this measurement do you mean a little less than half a teaspoon?
Yes, that’s correct.