Make Your Own Soap Without Lye (You’ll See What I Mean)
This post may contain affiliate links from which I will earn a commission. Learn more in our disclosure.
If you've always wanted to make soap but are worried about working with lye, here's your answer. This homemade lye-free soap is truly the “I'm scared to work with lye” version of How to Make Homemade Soap.

Homemade soap is great for many reasons, but it can be a bit daunting to make. One of the reasons is the need to work with lye. It's definitely not something you want to be working with when you have little ones running around.
Thankfully there's an answer for that and I'm sure you'll be surprised at how easy it is and how gorgeous the results can be.
I Was a Lye Scaredy Cat
For years, I've wanted to make my own soap, but I've never done it.
I've drooled over others' homemade soap creations and felt deficient in my thriftiness, craftiness, and domestic skills, simply because I'd never. made. soap.
I have fond memories of a dear friend in the Chicago area who made HUGE batches of olive oil soap that was TO DIE FOR. She had enough money to buy whatever soap she wanted, but she just LOVED making soap and well, her soap was skin nourishing gorgeous.
She gifted me this soap when I was pregnant with our first child, but I wrote off making it because no way was I going to use lye in a kitchen where I'd have to time things so I didn't have a busy and inquisitive infant or toddler underfoot.
So I basically gave up all the soap-making dreams, and they never really came to be.
I even found the very book that my friend's soap recipe came from at a second hand store (and bought it), but I STILL never made soap.
So when a friend approached me about sharing a recipe for melt and pour soap that was easily made into “homemade soap” style, I was thrilled.
I assumed many other busy “lye scaredy cat” moms would love the chance to be crafty without being around something that might be a problem for their children's safety.
Lye-free Soap. Is It Possible?
Would you like to create an all natural product, free of harsh chemicals, that radiates your personality and taste? Consider hand-milled soap!
Also known as melt and pour soap, this method allows you to forgo the hazards of working with caustic lye, while enjoying the creativity of soap making.
This is why the title of the post includes the words “you'll see what I mean.” The lye work has been done for you already in making the melt and pour soap base.
Why You'll Love This Soap
There are simply so many reasons to love this soap. Let's count the ways, shall we?
No Toxic Additives
So many soaps on the market are loaded with artificial colors, artificial fragrances, and preservatives. If you make your own melt-and-pour soaps, you can use quality ingredients without the toxins.
Saves Lots of Money
Of course, if you make your own melt and pour soap, you will save a bunch of money over store-bought fancy soaps. With all the great melt-and-pour bases, you can make exquisite soaps to rival any “artisan” type of homemade soap.
Avoids Allergens
More and more people have sensitivities these days. Making your own soap allows you to customize ingredients to your needs.
Directions
Grate the soap base.

Add oil to soap, if desired.
Heat on low setting in a double boiler or crock pot. Stir frequently.

When liquefied, remove from heat.
Add desired ingredients.
Stir to desired consistency. Pour (or spoon) the soap mixture into molds. I placed some dried rose petals on the bottom of this flower mold.

Cool and remove from the mold. Cut into desired sizes and shapes using a soap cutter or a food scraper/shovel if needed.
Allow soap to dry.

Important Ingredient Information
1. Soap Bases, Including One That Really Stands Out
First of all, look for soap that is free of chemicals and fragrances. The simpler the better when it comes to hand milling. White or cream-colored work best.
Some of the more trusted online sources include:
- Brambleberry
- Bulk Apothecary
- Amazon
Here are some options for melt-and-pour soap bases with my favorite highlighted at the end.
- Goat's Milk Soap Base – this is a pretty nice base
- Glycerin Soap Base – makes a traditional clear melt-and-pour soap
- Cocoa Butter Soap Base
- Shea Butter Soap Base – this one seems to perform very well and has great reviews and the ingredients are really clean for a melt-and-pour base. If you want an artisan-type soap that's easy to make, this is a great way to go.
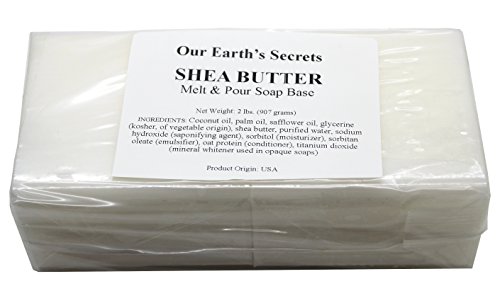
Shea Butter - 2 Pound Melt and Pour Soap Base
This Shea Butter Melt and Pour Soap Base is one of the cleanest soap bases out there. Plus it helps you create soaps that look very close to artisan soaps -- all without handling lye!
It's made from 5% refined shea butter, and is soy free, lathers well and is made in the USA.
2. Molds
A simple bread loaf pan will work depending on how much soap you're melting. Line the mold with parchment paper for easy removal.
Silicone molds work really well too. These come in fun shapes and sizes like this flower mold (similar to the one used for the soaps in this post).
Note that you'll need parchment paper if you choose the bread mold pan option.
3. Herbs and Plants
Do you love lavender? Dried lavender or fresh lavender makes a perfect addition.
Roses? Dried rose petals or even fresh rose petals work beautifully.
Plant powders can add not only skin benefits but double as natural colorants. Turmeric, for example, turns the soap a lovely orange while adding nourishing anti-inflammatory qualities. Spirulina powder makes a lovely green. Beet powder adds a nice pink color.
4. Pure Fragrances
Forgo the petroleum-based fragrances and add scent using 100% natural essential oils. Essential oils carry through the hand milling process quite well – so pick a scent you enjoy and have fun!
Herb/essential oil combinations that work well include:
- Thyme Oil with turmeric powder
- Plumeria Oil with dried lavender
- Peppermint Oil with activated charcoal for a deep cleansing experience.
How Much Essential Oil Should You Add to Soap?
How much essential oils you use in homemade soap depends on several things including how strong of a scent you would like, and the oil you are using.
For a strong scent, 0.7 ounces of essential oil per pound of cold process soap is a good amount. For melt and pour, you can typically add 0.3 ounces per pound.
Cold process soap is more of a harsh process and there are a number of chemical changes that occur when making the soap, so you can use more oils.
To avoid skin irritation it's important to not use too much of an essential oil in your soap. This fragrance calculator can help you choose the right amount of essential oils to use.
5. Liquids
You'll need to add a slight amount of liquid to keep the soap from burning during the melting process. While water works fine, possible liquids that add some nice benefits and make your soap special include coffee, green tea, kombucha, infused herbs, coconut milk, and floral hydrosol.
6. Fun Add-Ins
Besides things like herbs and plants, there are so many other fun add-ins. The sky is truly the limit!
How about:
- coffee beans
- cacao nibs
- coffee grounds—smell great and are great for exfoliating too
- citrus peels
- seeds (chia, poppy, apricot, flax)
- matcha powder—adds a lovely green color
- Himalayan salt—adds a nice pink hue
- tea leaves

Ingredients
- 8 ounces Natural Soap Base
- Molds (I love these flower molds, circular molds, or these simple bar molds)
- Herbs or flowers (like these lavender flowers), rose petals
- .15 ounces Essential Oils (about 90 drops)
- Parchment Paper (depending on what mold you use)
- Grater (a cheese grater, salad shooter, or food processor are good choices)
- 1/2 teaspoon oil (optional)
Instructions
- Grate 8 ounces of the soap base (two regular size bars.) A cheese grater works well, as does a salad shooter. A food processor also works.
- Add the oil, if desired, to thin the soap.
- Heat on low in a double boiler or crock pot. You can also place in oven-safe pot and heat in the oven at lowest setting. Stir frequently to avoid burning. This can take anywhere from 15 minutes to an hour.
- When soap is liquefied, remove from heat. It will be somewhat lumpy and translucent.
- Add desired ingredients.(For the main photos here, I used Pink Himalayan salt and dried rose petals from my daughter's wedding. I added Rose Geranium essential oil which created a lovely rose scent.)
- Stir to desired consistency. Pour (or spoon) soap mixture into molds. I placed some dried rose petals on the bottom of this flower mold.
- Cool the soap and remove from mold (place mold into freezer for up to 1 hour to make this easier). Cut into desired sizes and shapes using a soap cutter or a food scraper/shovel.
- Allow soap to dry for several days or more.
- Dry the soap thoroughly between uses to extend its life.
More Easy DIY Personal Care Products You'll Love
How about trying out the following DIY Personal Care Products too? These are great ways to take more steps towards clean living.
- Nourishing Sugar Scrub
- Homemade Lip Scrub – your lips will love this!
- Homemade Moisturizing Foaming Soap– a super frugal alternative to store-bought foaming soap
- Homemade Body Wash – smells and works great
I'd love to hear how this goes for you!

Andrea is a former journalist and the mother of nine children ranging in age from 28 to 12. Following a toxic mold exposure, Andrea and her family discovered the wonders of natural living. Andrea is the founder and president of momsAWARE, an educational organization designed to empower others to live healthy in a toxic world. You can follow her family’s journey at It Takes Time.
Thanks for the article. As for the angry readers, well, they are just completely uneducated. If they had half a brain they would know that soap without lye is not technically soap. I haven’t made my own soap yet, however, I’m doing research, and I knew what your title meant.
Ignore the haters. Maybe if they shut their mouths for a second and actually read something they may learn a thing or two.
Keep doing your thing soap lady. Take care. 😉
You are so welcome!
I’ve done a melt and pour soap with leftover organic coffee grounds in it and a little cocoa and vanilla.. Smells absolutely awesome but it is also very useful in the kitchen… The coffee takes the garlic and onion smells that don’t want to leave your skin right off your hands in one wash.. Plus it exfoliates..
Sounds fabulous!
Got in my mind I could make homemade soaps as gifts. Can I use shea butter in recipe and will it lather?
Yes you can use it and I think they should lather b/c of the soap base. 🙂
I need some advice! I made this soap over the weekend–followed your directions precisely. Made 2 batches–one with just lavender essential oil and some dried lavender buds that I sprinkled in the bottom of the loaf pan before pouring the soap in–and one colored with some turmeric powder and scented with grapefruit eo. Both batches, after slicing into pieces the next day, were flakier than I had hoped. Definitely NOT like the original bars of soap I used (which was Trader Joe’s Oatmeal & Honey Soap, btw). Now I’m seeing in your photos that yours are a tad flaky as well. And yet, the handmade soaps I’ve purchased aren’t flaky at all. Is this typical of “rebatching”? If you add more water to the crockpot, would that help? Or is less water better?
Also, I’m thinking of rebatching these soaps I made and starting over. Is that recommended?
One thing I am going to do is buy some cute little silicone molds. I think they would look better. I really wanted them to be awesome, but I’m a bit underwhelmed. I could use some advice!! Thanks. I appreciate your tutorial.
Hi there. I will pass your comment on to the author and hopefully she can respond. Thanks!
Yes, I think you can melt it again and be sure it’s truly melted to a liquid. Add a bit of glycerin possibly and try pouring into molds. You can then try refrigerating the molds and see if it’s less flaky.
Dear
I make natural soap from aloevera but I didn’t put lye in it and my soap always grow mold on it .How can I do with this problem ?
Are you asking me or the person you replied to? I am sorry but I don’t know.
https://www.chagrinvalleysoapandsalve.com/idascorner/soap/is-there-lye-in-your-soap-wont-it-harm-my-skin
Please note that without lye there is no soap, so what you’ve created isn’t soap !
It’s not that serious. It’s her article and her recipe. She can name her title any way she like. I’m new to soaping and didn’t get offended and if you did get offended. Ummmmm!!! So what! Who cares! Soap goes on!! Some of you all are taking this too personal. Pump your breaks folks. Keep Soaping lady!!!
Thanks for the encouragement, Krystal. I was a bit confused about all the hubbub myself. 🙂
um so when your finished is the soap going to lather /produce foam
Yes, it should. Hope it works for you!
Can beeswax be incorporated? I have excess wax from my hives this year and would lov3 to use the lye less recipe but worried I may ruin it if I add the honeycomb
I would think so. Enjoy!
I make lots of different types of melt and pour soaps. They still have lye in the base but you just aren’t handling it directly and I’ve made lots of beautiful soaps with this method. They are still handmade and look wonderful, the only difference is that all of the butters and oils and lye are already there. It makes it easier, safer, but exactly the same, only difference maybe would be that you could decide what oils you wanted, like extra moisturizing or extra lathering. Melt and pour makes it easier for us homemakers with young children. Keep up the good work!
Thanks, Kelly! Hope to see you around again and thanks for the encouragement!
There is no lye in the base. The base was made with lye, but the base does not contain lye unless the base was made horribly wrong (too much lye and not enough fats) in which case it will burn your skin when you use it. Saponification is a chemical reaction that turns lye and fat into soap. The lye isn’t there anymore. The fats aren’t there anymore either, unless you added a bit extra for superfatting. The fudge factor in the title isn’t the “without lye”, it’s the “make soap”. M&P is “without lye”, but technically not “making soap” since you’re really “decorating” existing soap (which the author explains in the article).
goodness! i thought people were only mean to me for no reason! your title was not deceptive. i know nothing about concocting soap, and i knew what you meant. your article was great, plus you taught me a valuable lesson about not incredible hulking out on people, because that’s probably their desire! i am going to attempt to create some soaps, probably using the olive oil melt and pour base. i have some organic handmade soaps that i love, and it seems like an easy way to make a few bucks! going to start simple and see how it goes! thanks for sharing!
Thanks much and enjoy the soapmaking!!
Thank you for posting the recipe! Very helpful to a new beginner learning how to craft soap.
Glad to hear it – thanks!